LINEリッチメニュー - レシートローラー設定ガイド
リッチメニューとはLINE公式アカウントのトーク画面下部に表示されるメニューです。ユーザーがトーク画面を開くたびに表示されるため、とても目立ち、アピール力が高く、ショップカードやクーポンへの誘導に効果的です。LINEリッチメニューはLINE公式アカウントのすべての料金プランで利用可能です。
LINE公式アカウントの管理画面にアクセスして作成(リッチメニューを作成するをご参照ください。)することができますが、レシートローラーアプリで簡単に設定してご利用頂けます。今回は、リッチメニューの設定についてご紹介致します。
スマレジ管理画面にログイン
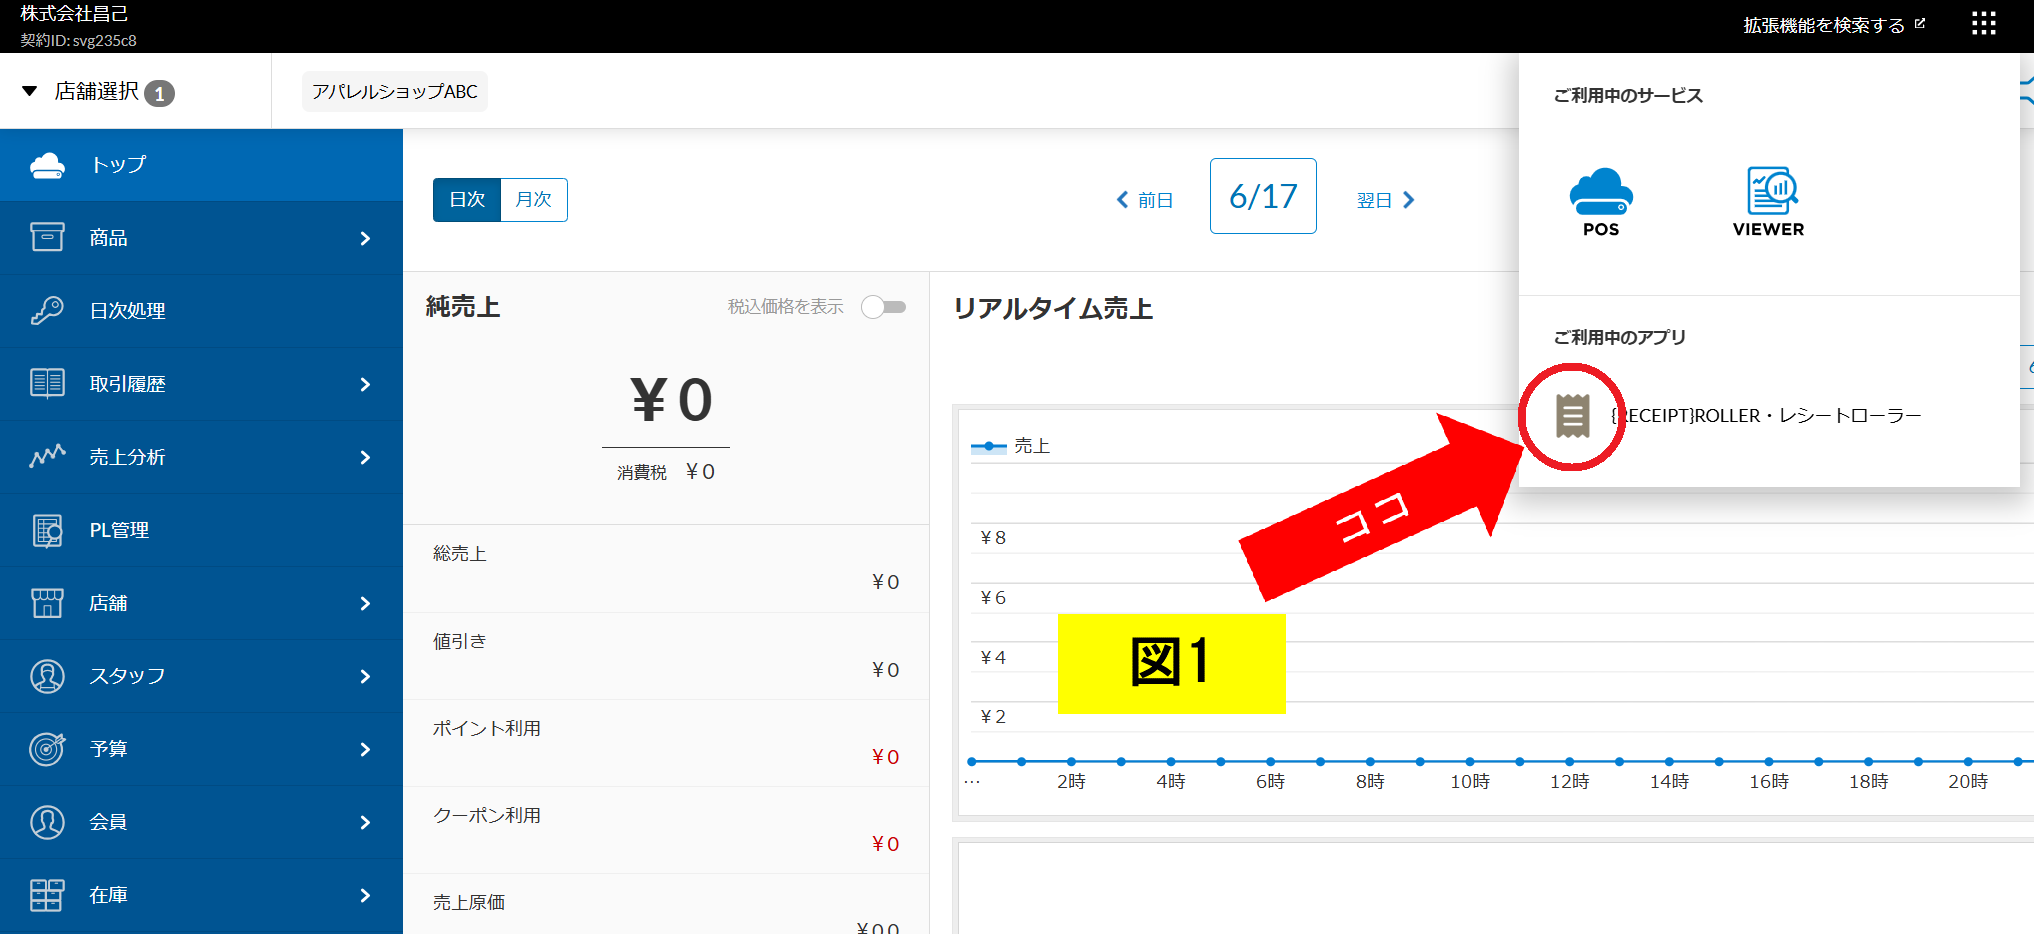
スマレジ管理画面右上にある、ご利用中のアプリにある「レシートローラー」をクリックします。(図1)
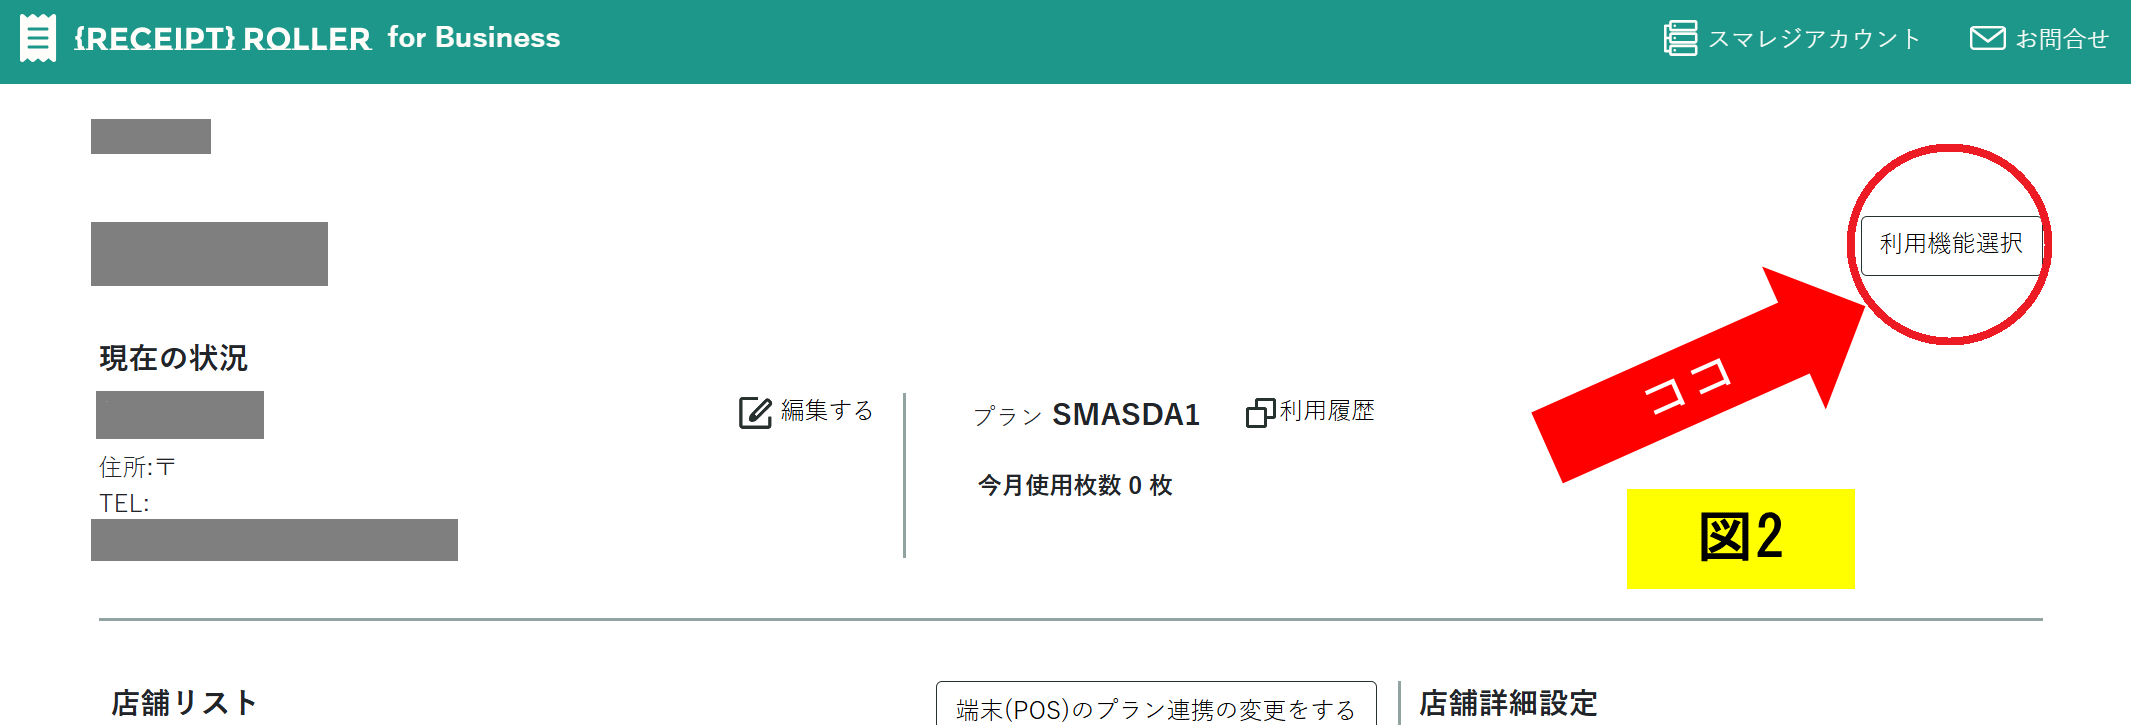
「利用機能選択」をクリックします。(図2)
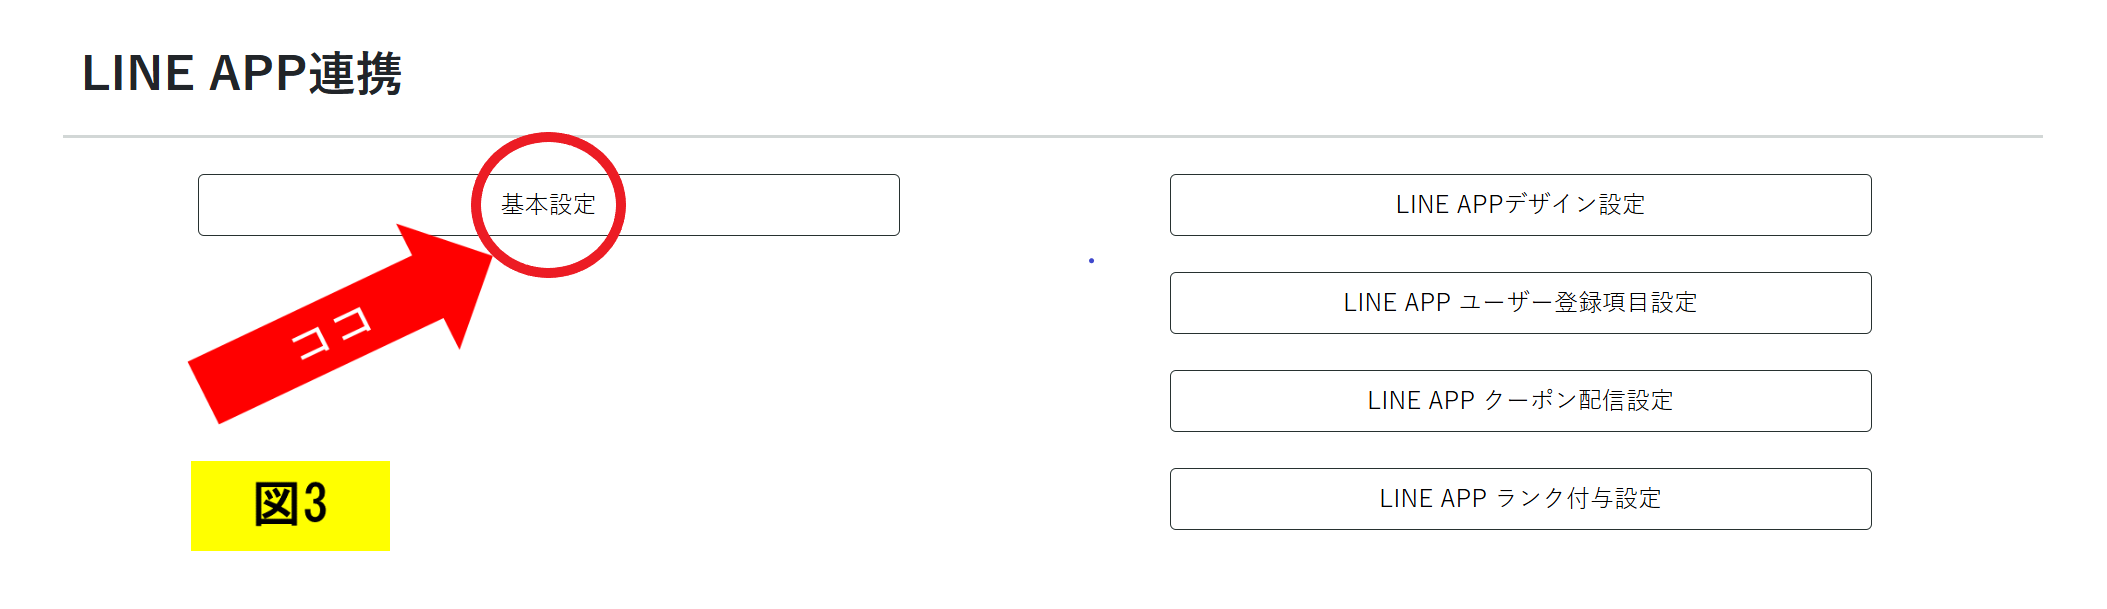
「基本設定」をクリックします。(図3)
リッチメニューの設定
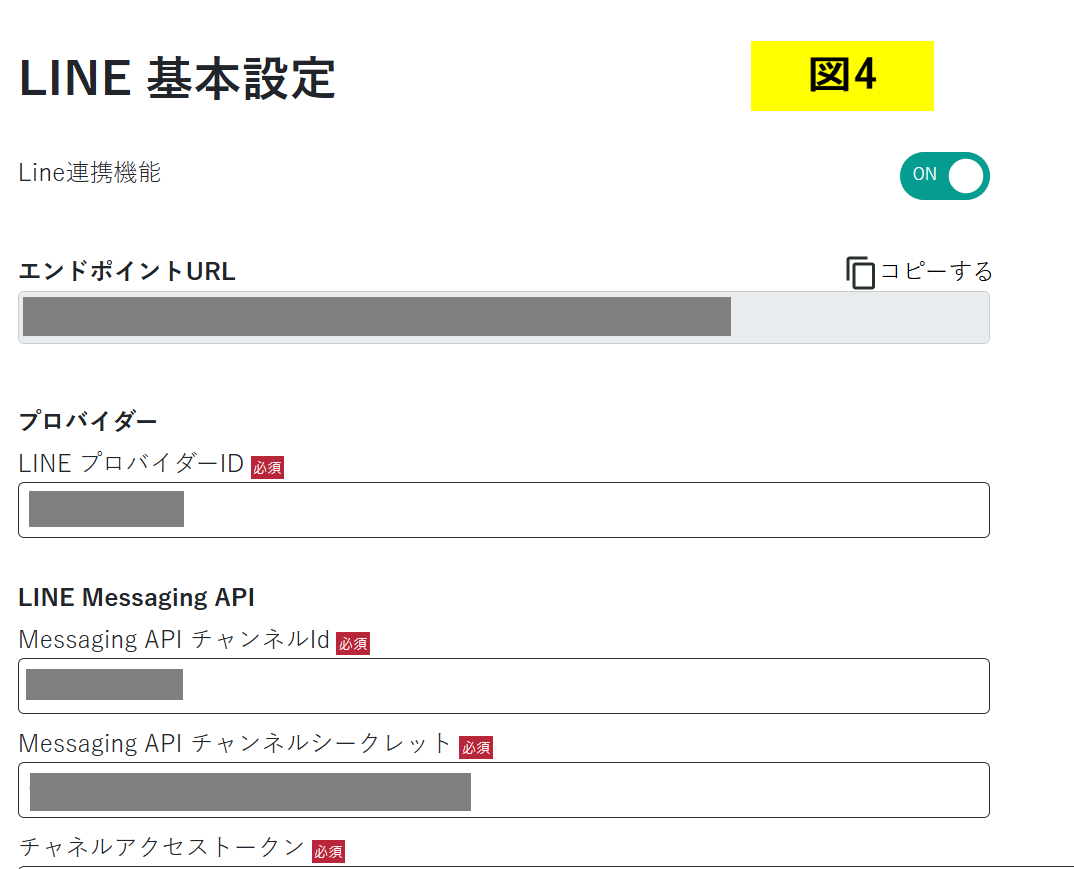
LINE基本設定画面をスクロールして、リッチメニュー設定画面を表示します。(図4)
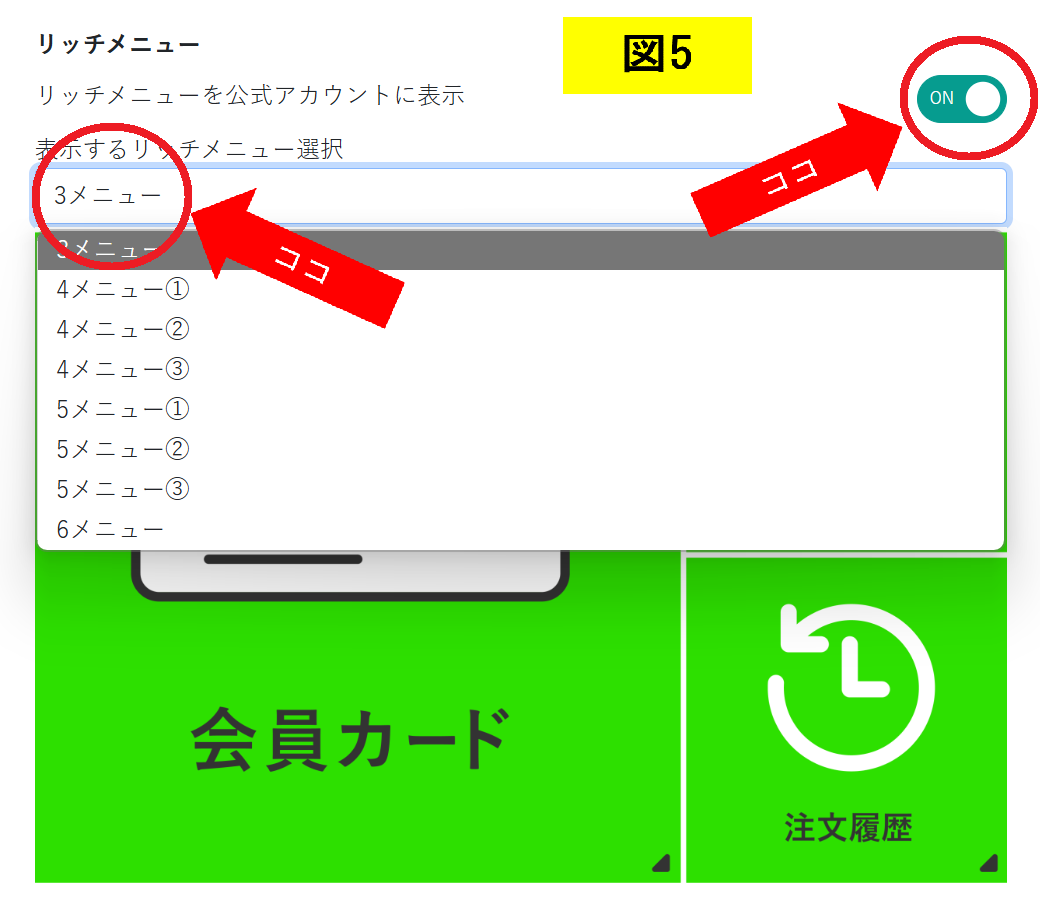
「リッチメニューを公式アカウントに表示」をONにして、「表示するリッチメニュー選択」からリッチメニューを選んでください。(図5)
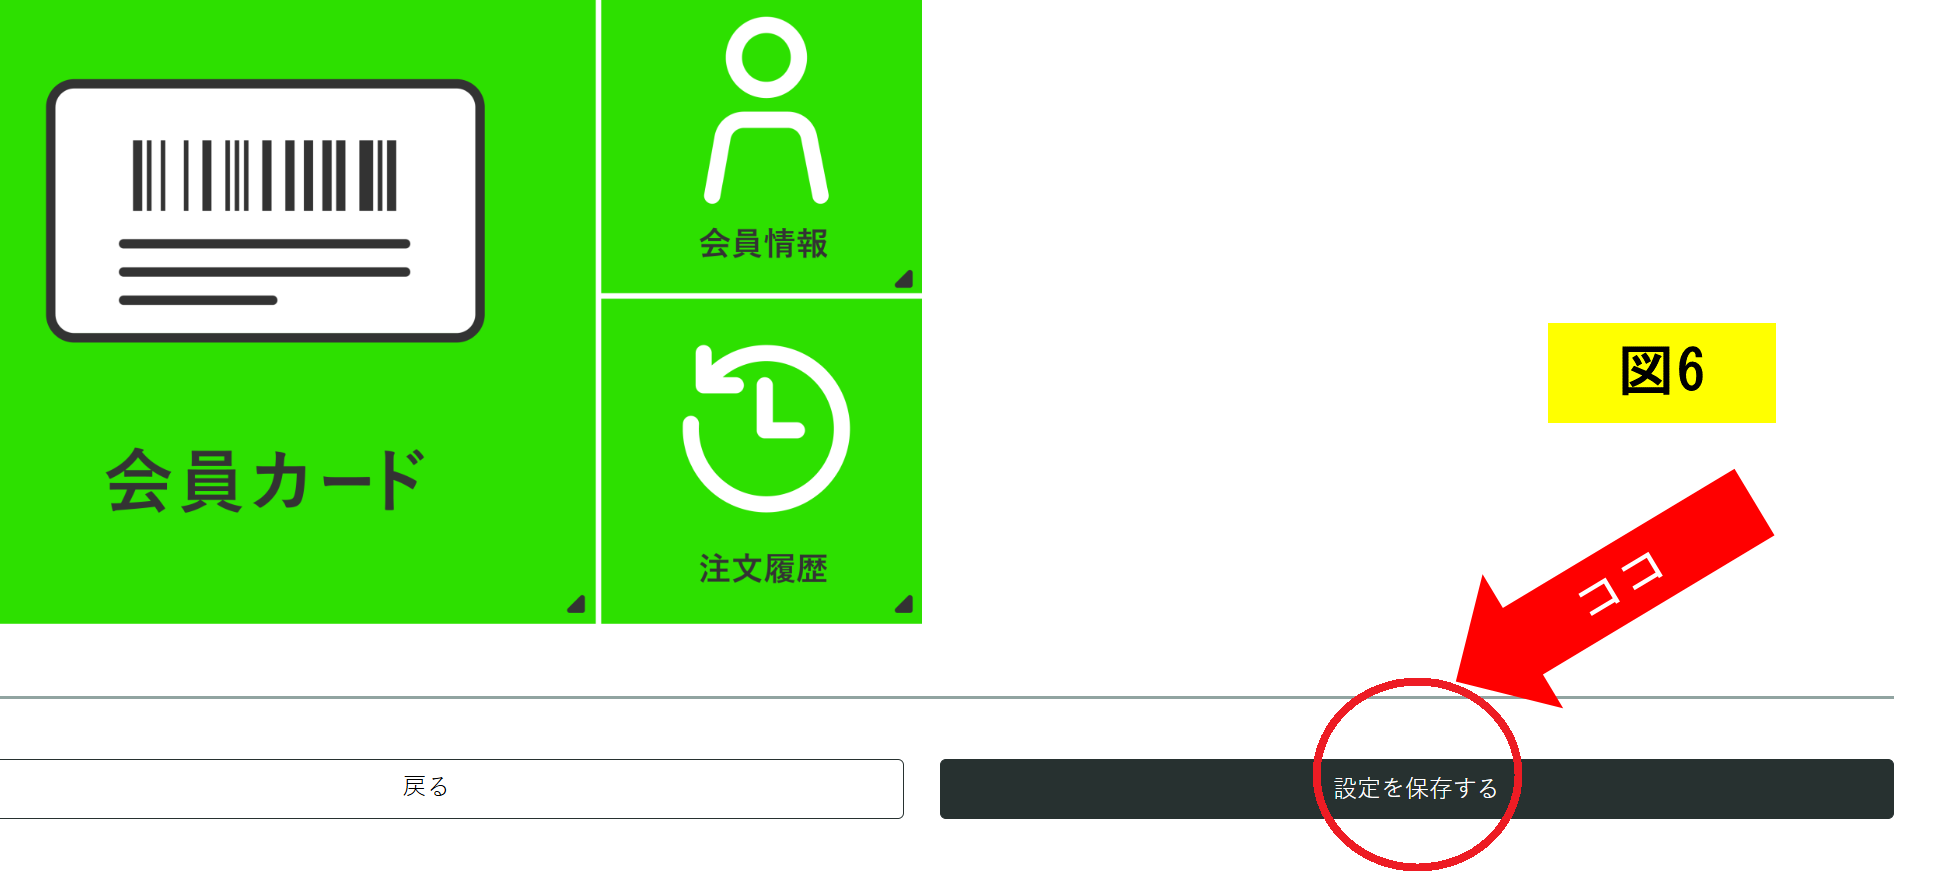
「設定を保存する」をクリックします。(図6)
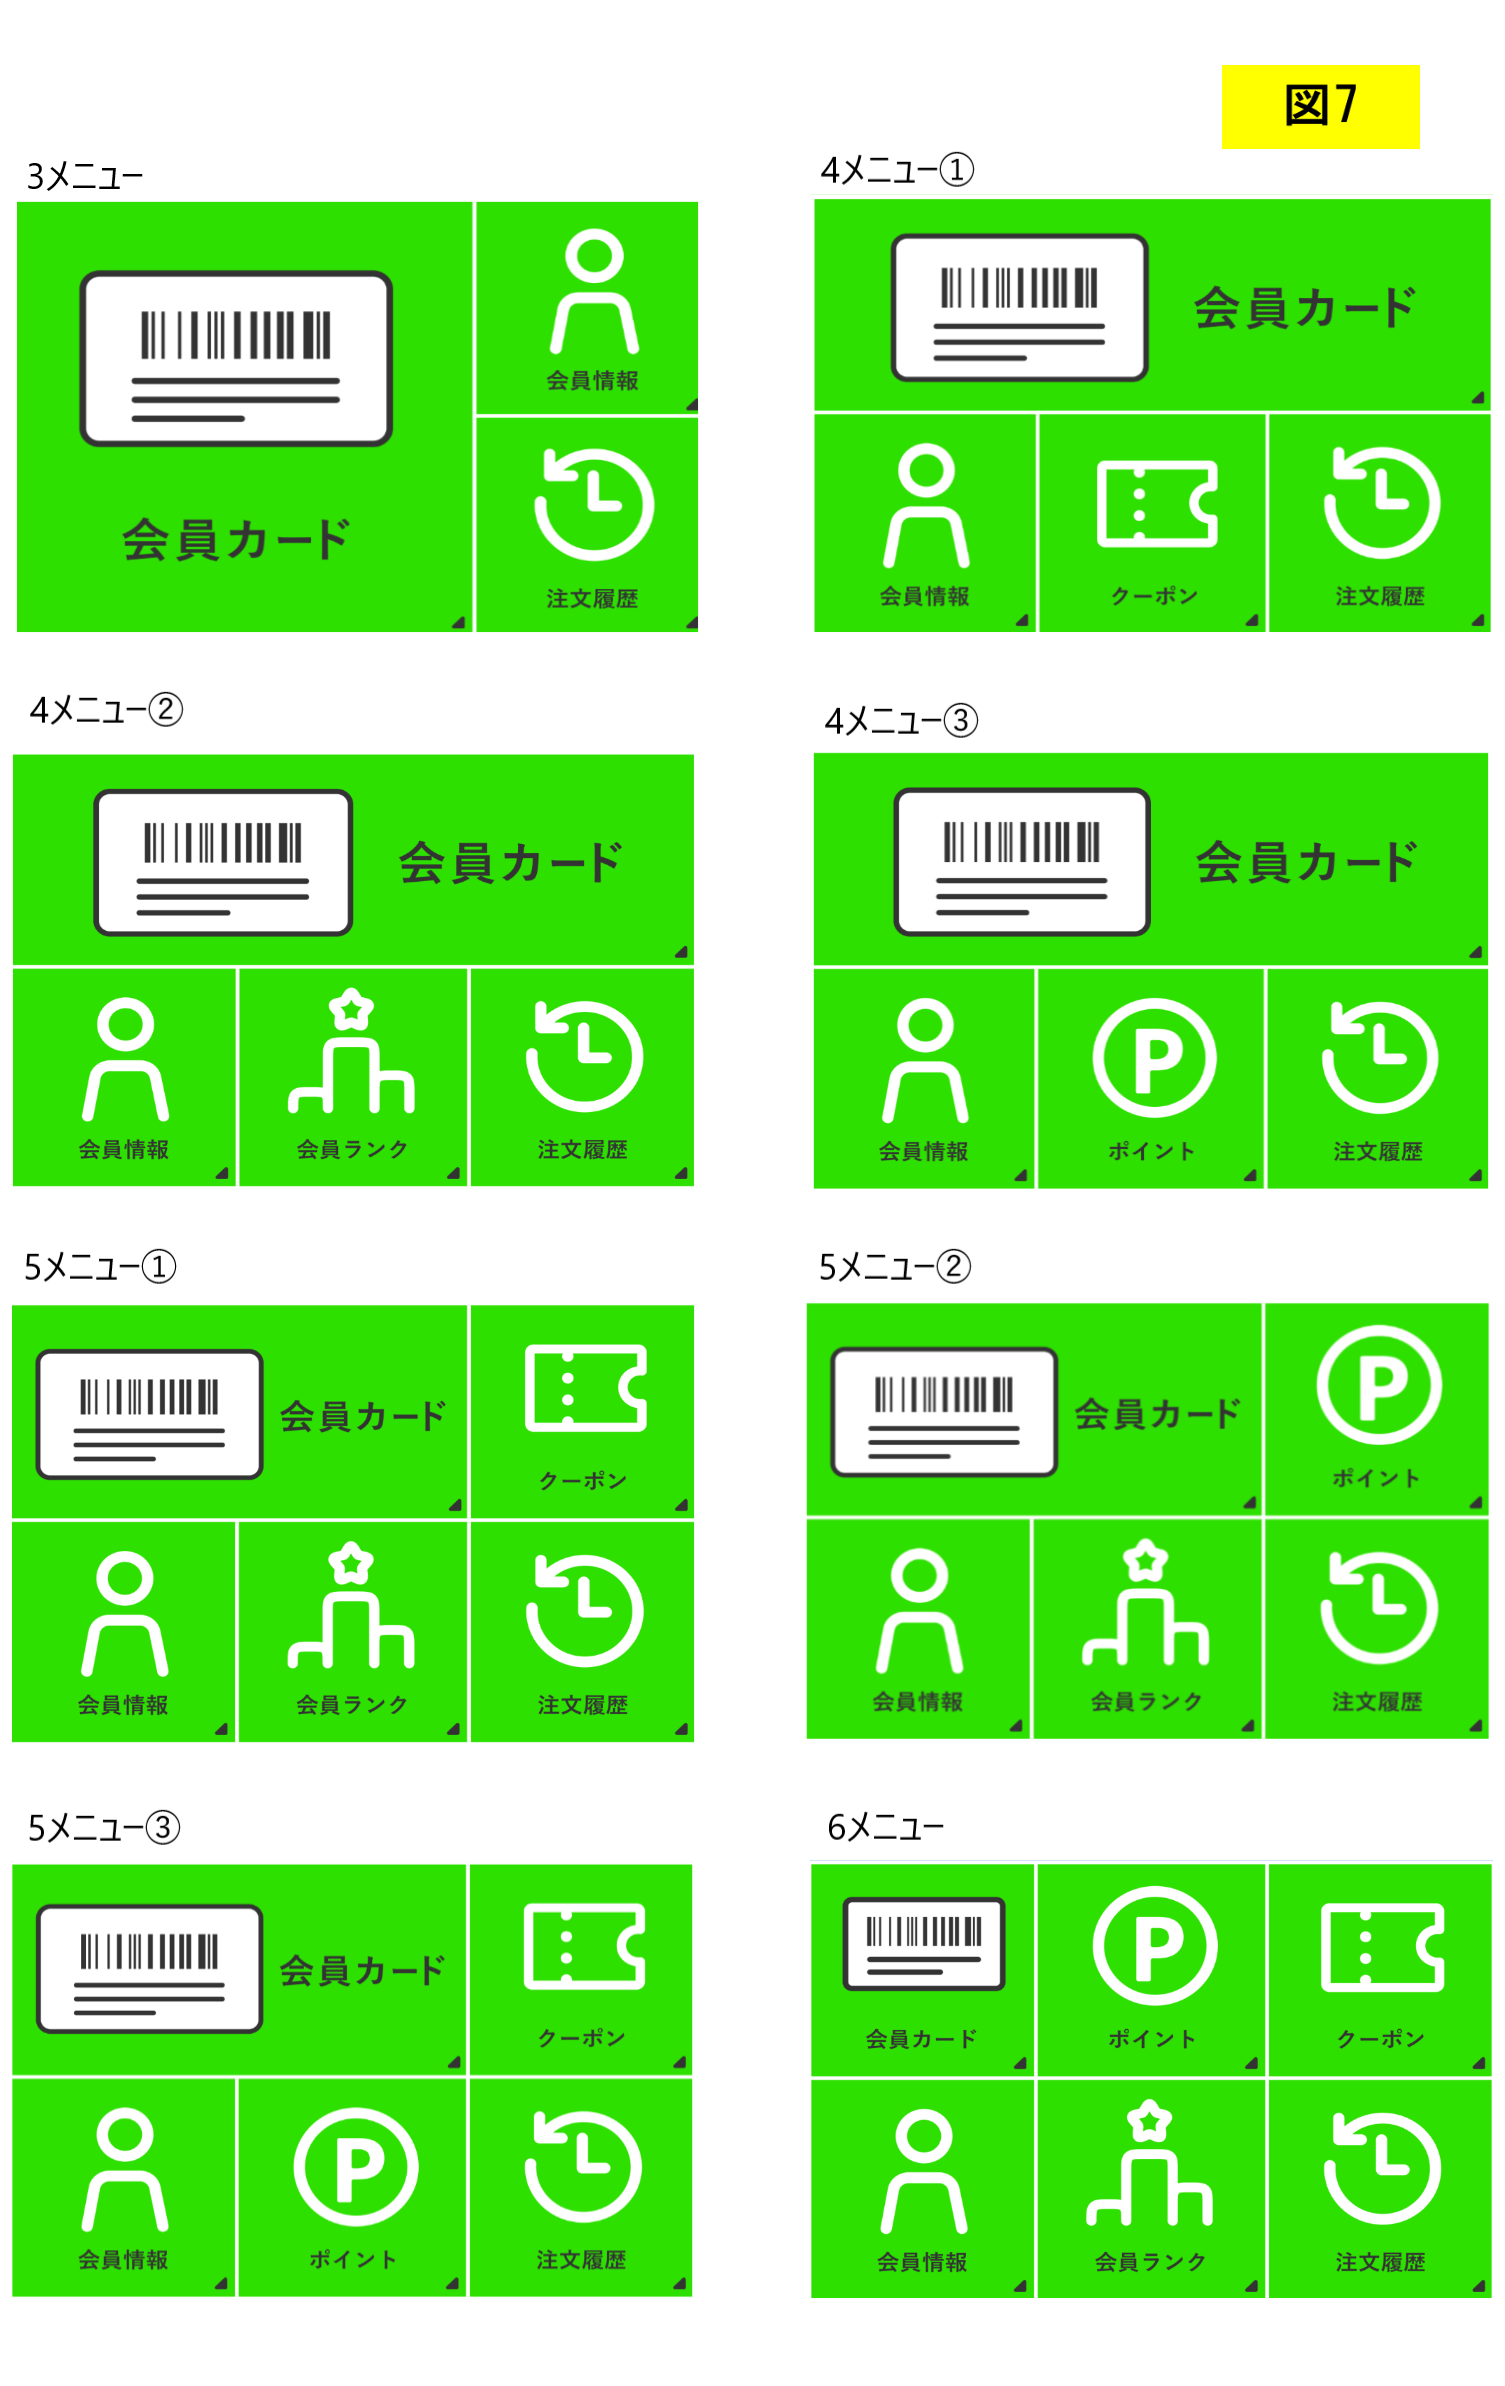
8種類のリッチメニューから選択して頂けます。(図7)
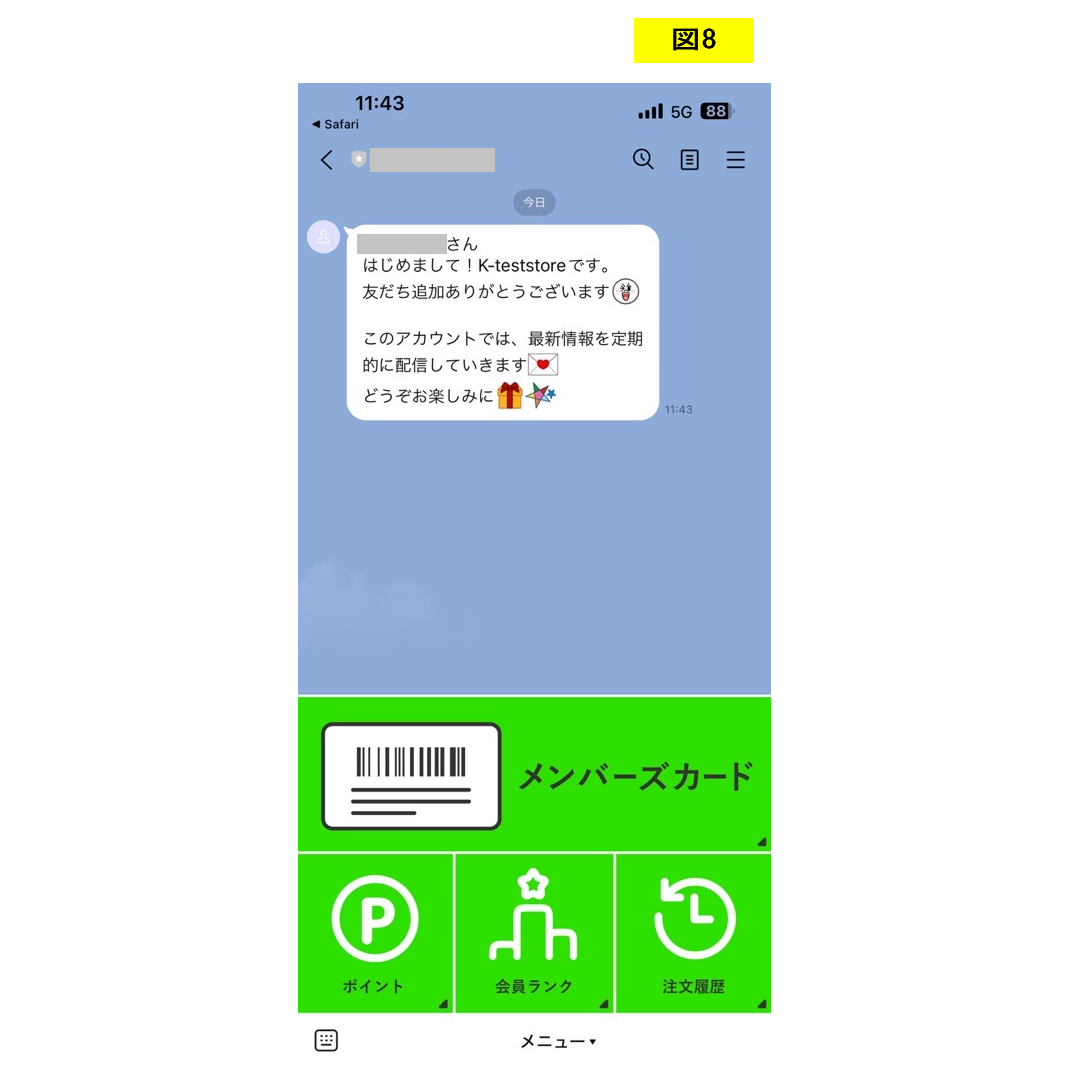
LINEではこのように表示されます。(図8)
LINEアプリデザイン設定
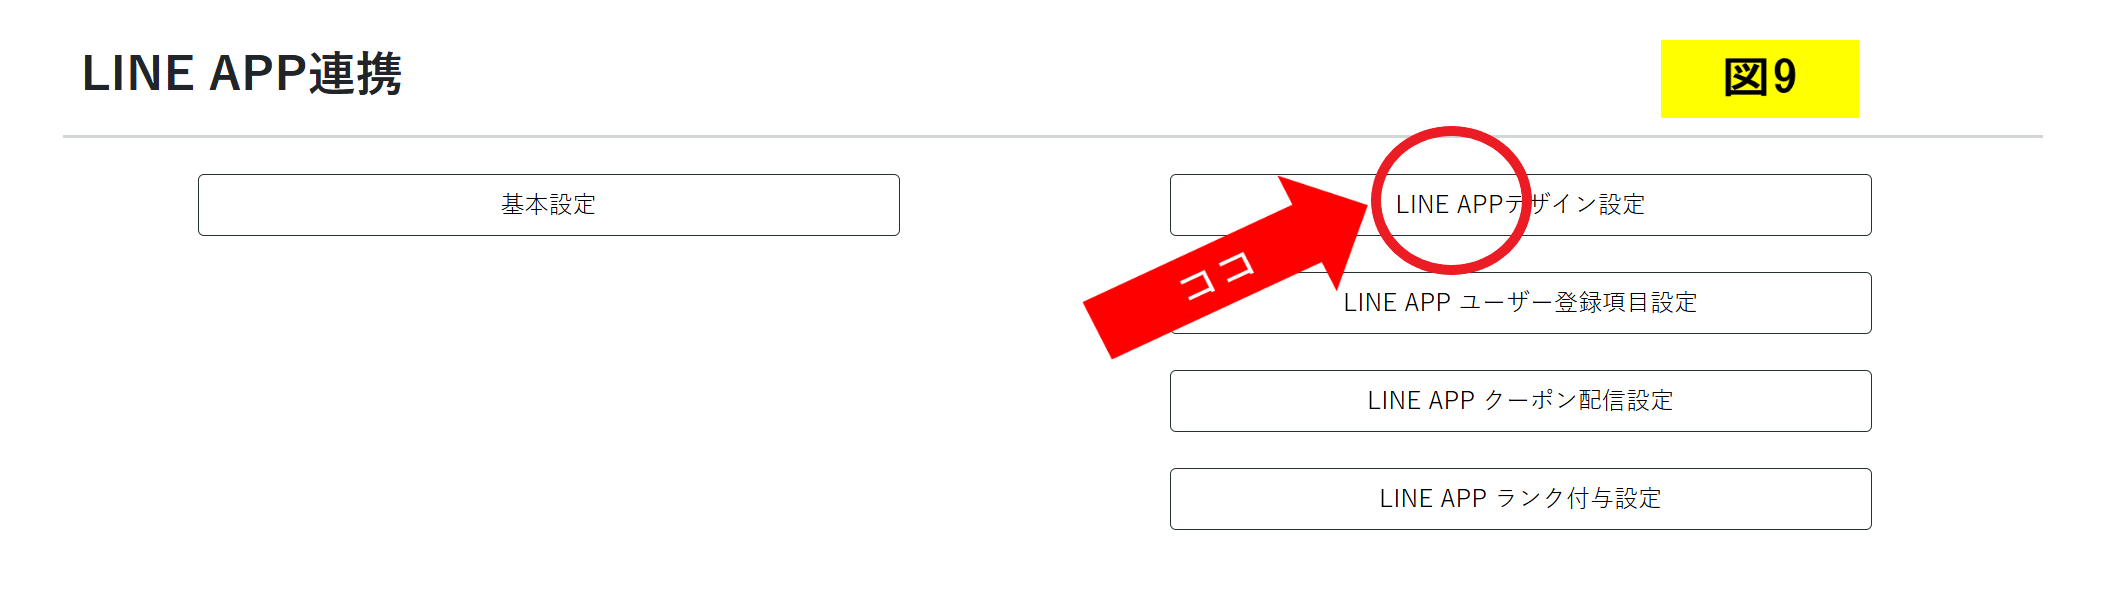
「LINE APP連携」画面に戻り、「LINE APPデザイン設定」をクリックします。(図9)
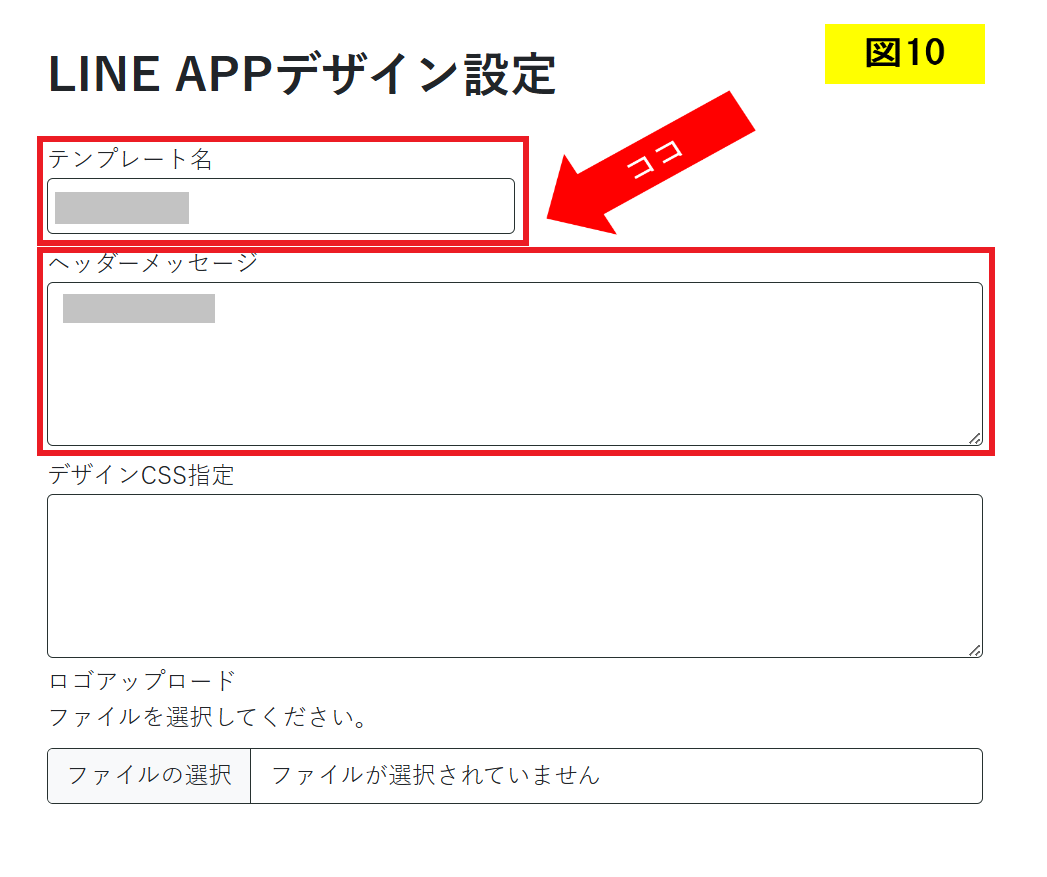
「テンプレート名」と「ヘッダーメッセージ」を入力してください。(図10)
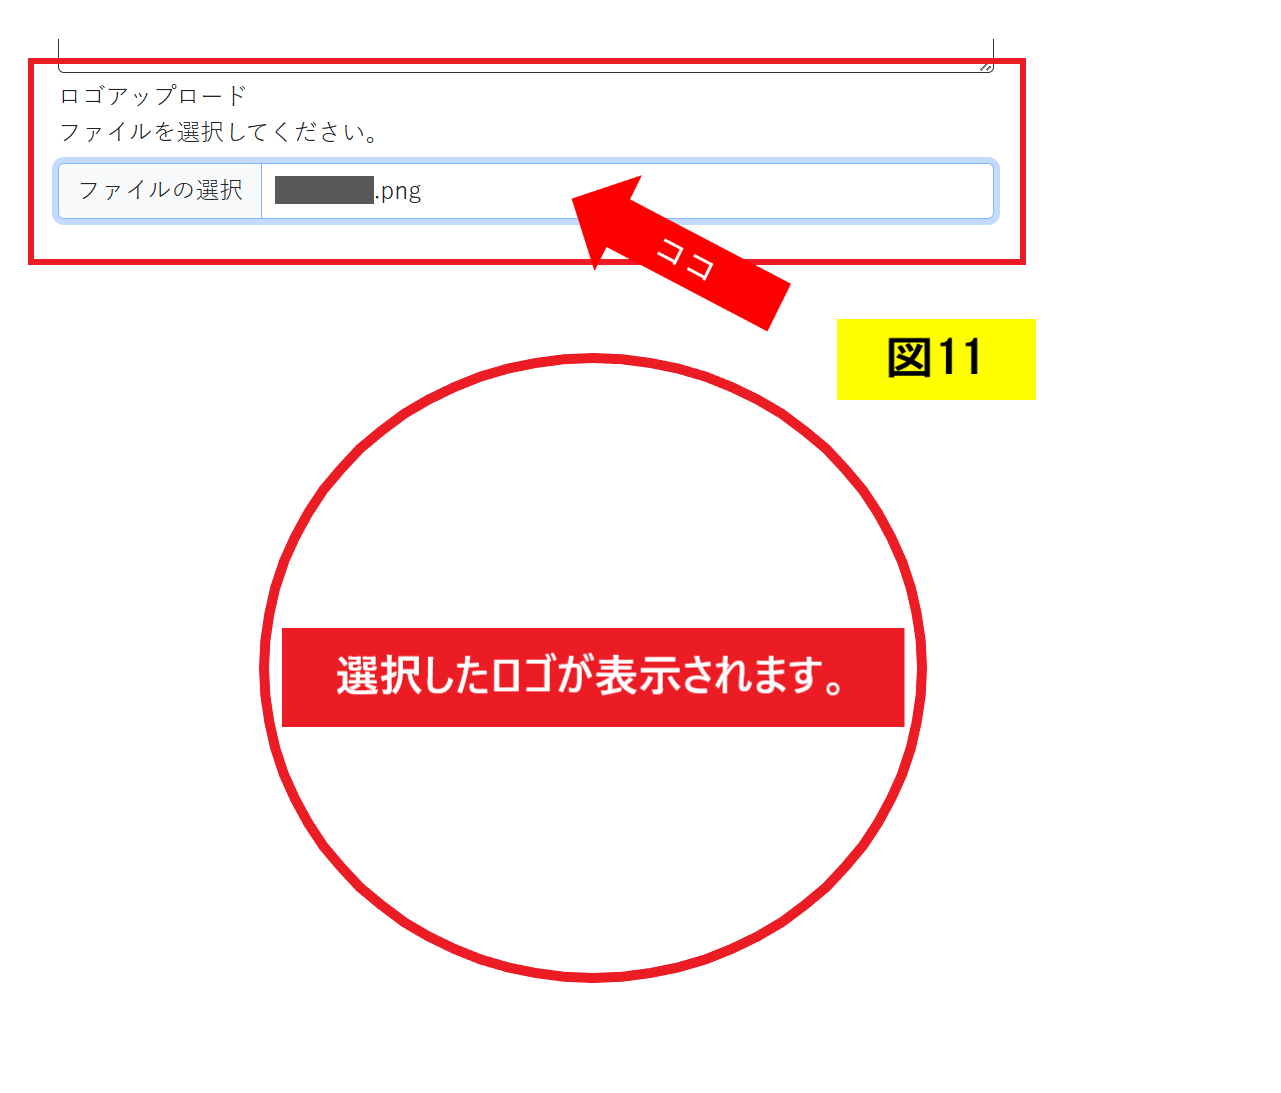
「ファイルの選択」をクリックし、ストアロゴを選択してください。下部に選択したロゴが表示されます。(図11)
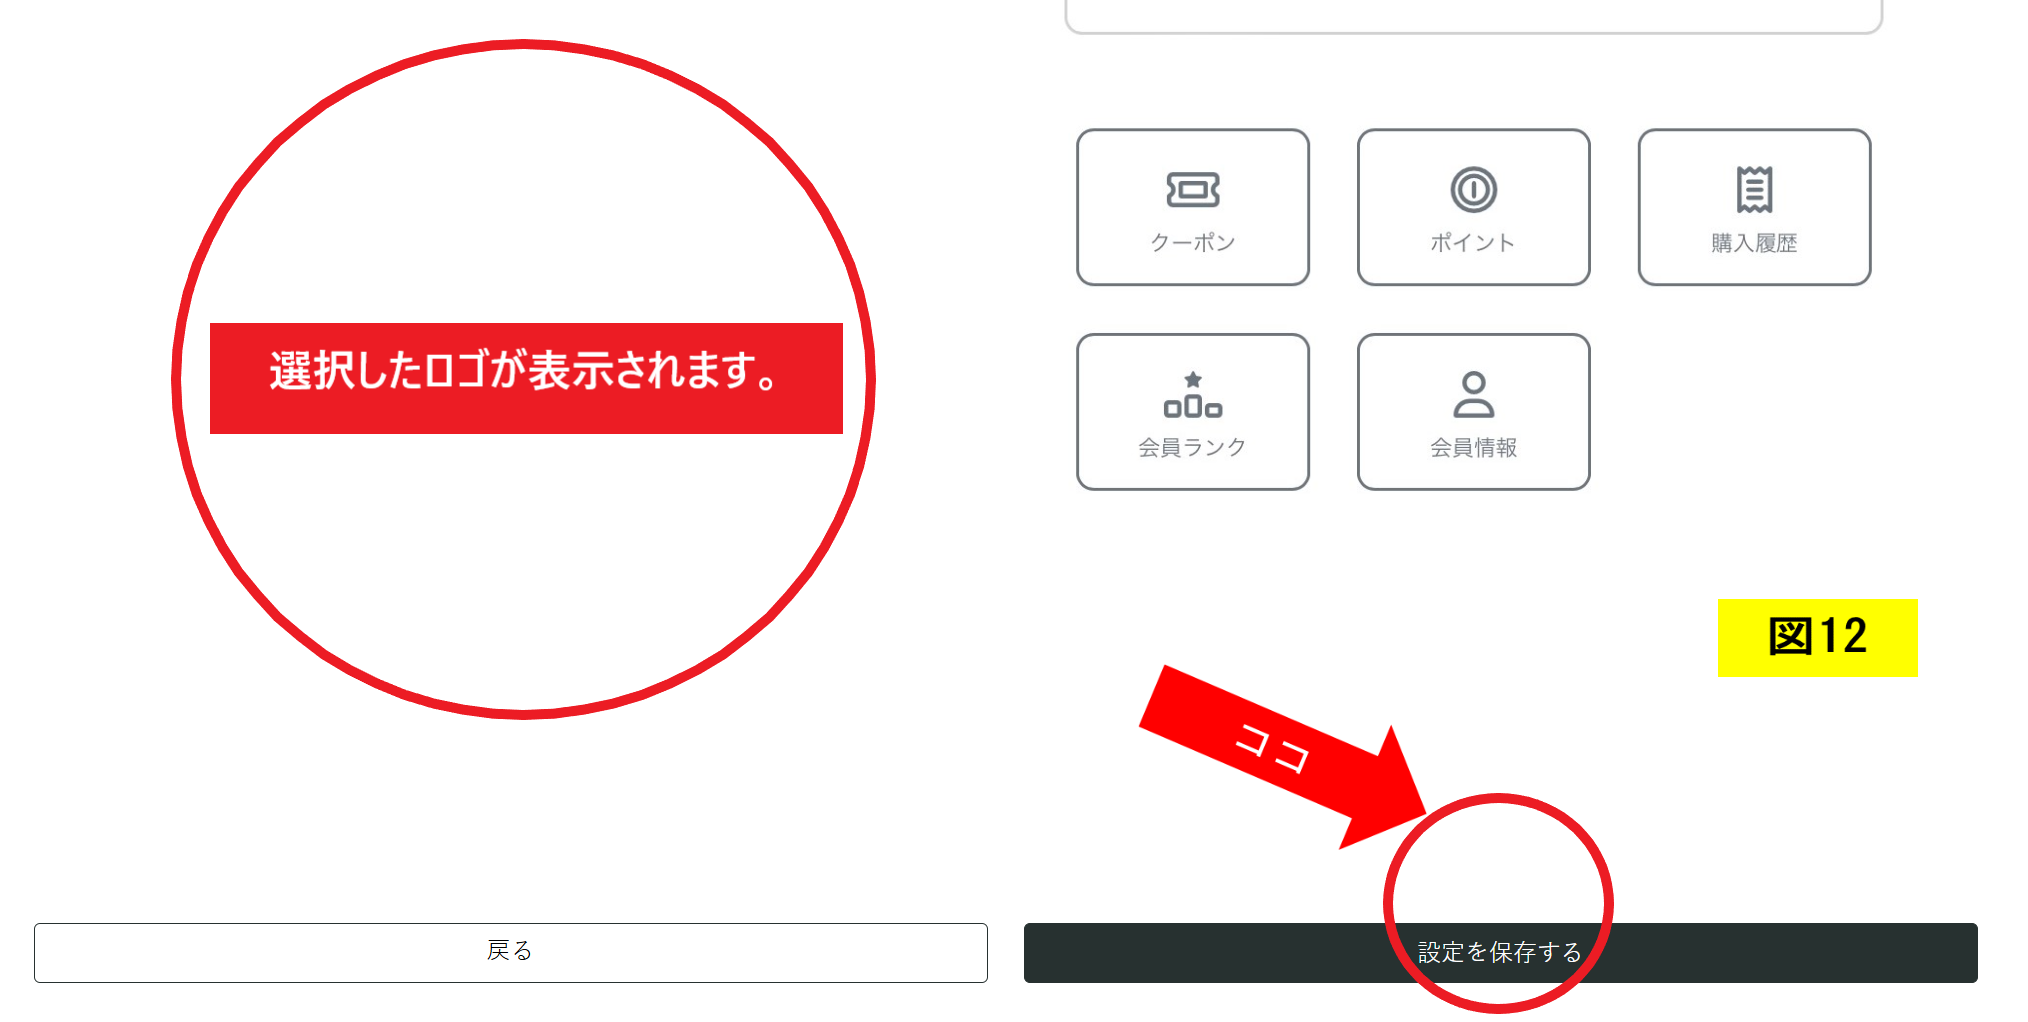
「設定を保存する」をクリックします。(図12)
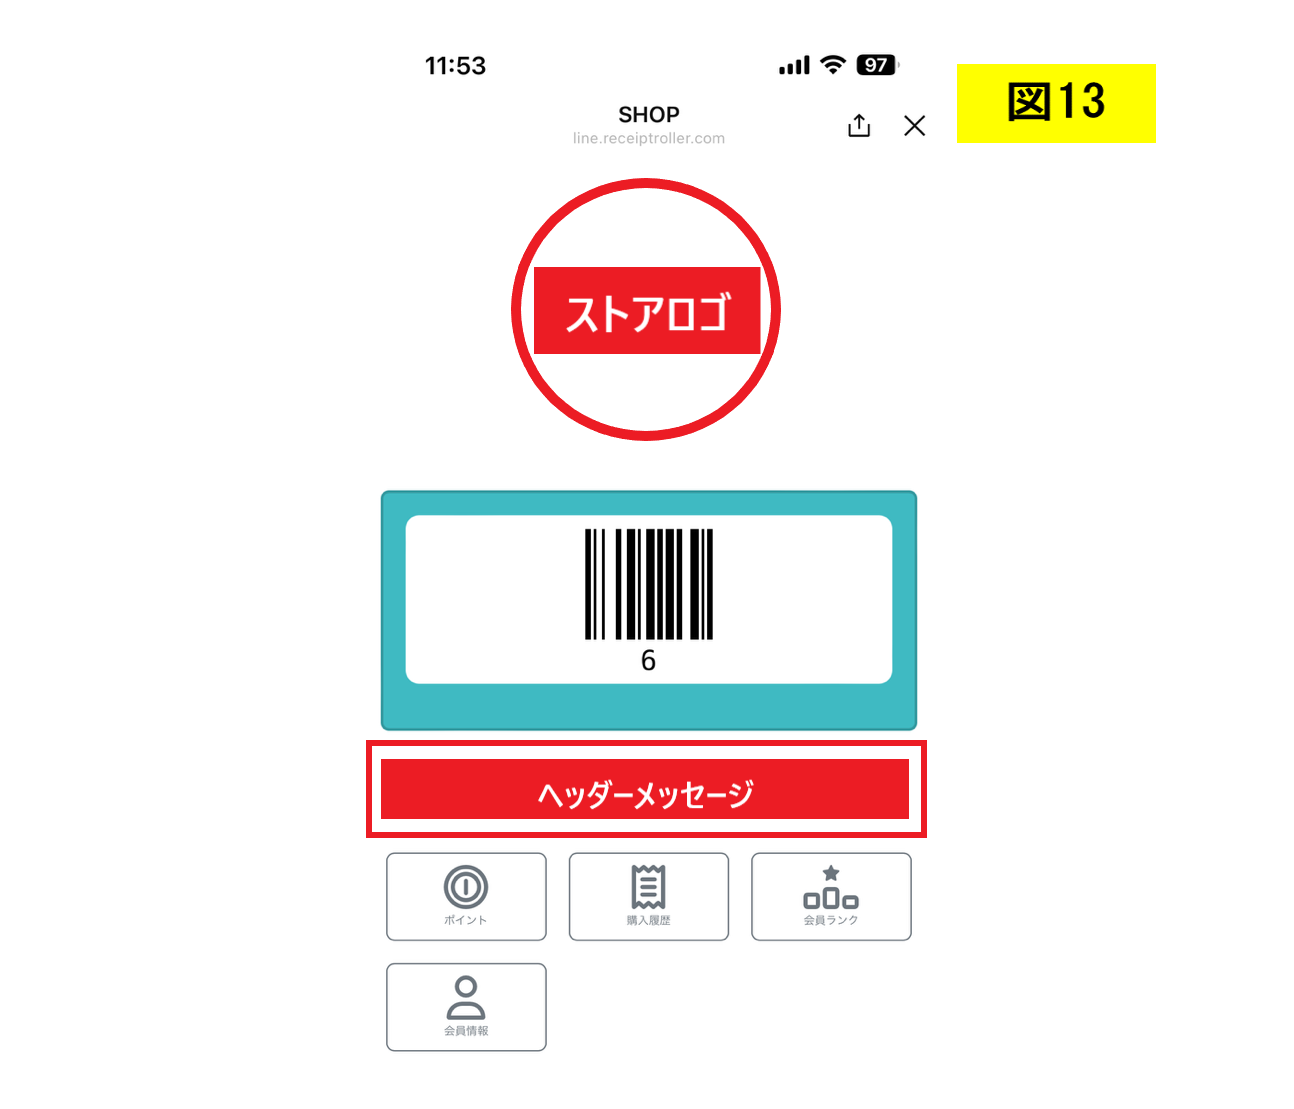
LINEリッチメニューの「会員カード」をタップすると、設定したストアロゴとヘッダーメッセージが表示されます。(図13)
LINE APPユーザー登録項目設定
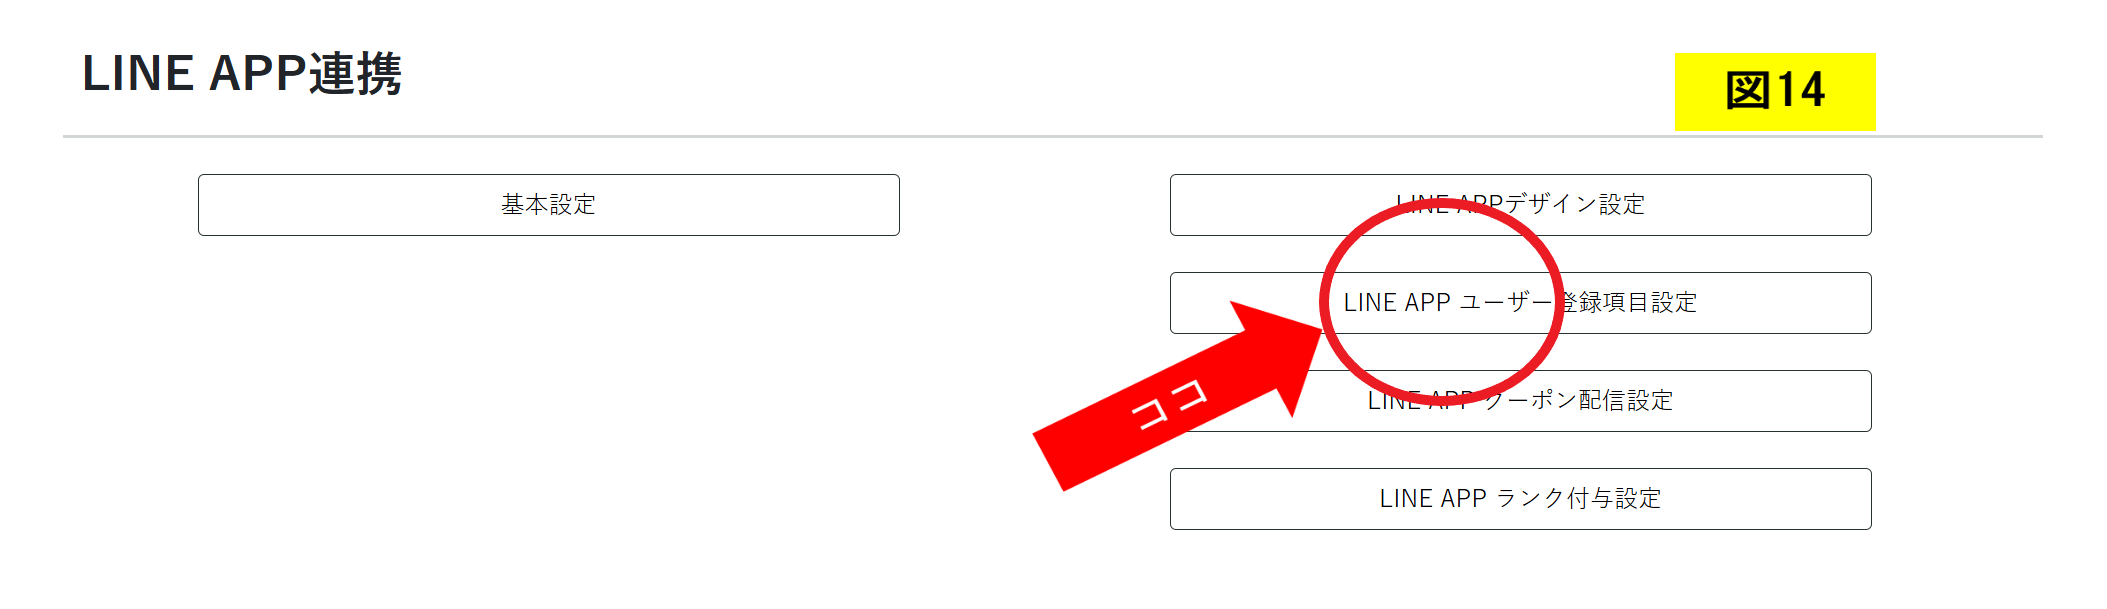
「LINE APP連携」画面に戻り、「LINE APPユーザー登録項目設定」をクリックします。(図14)
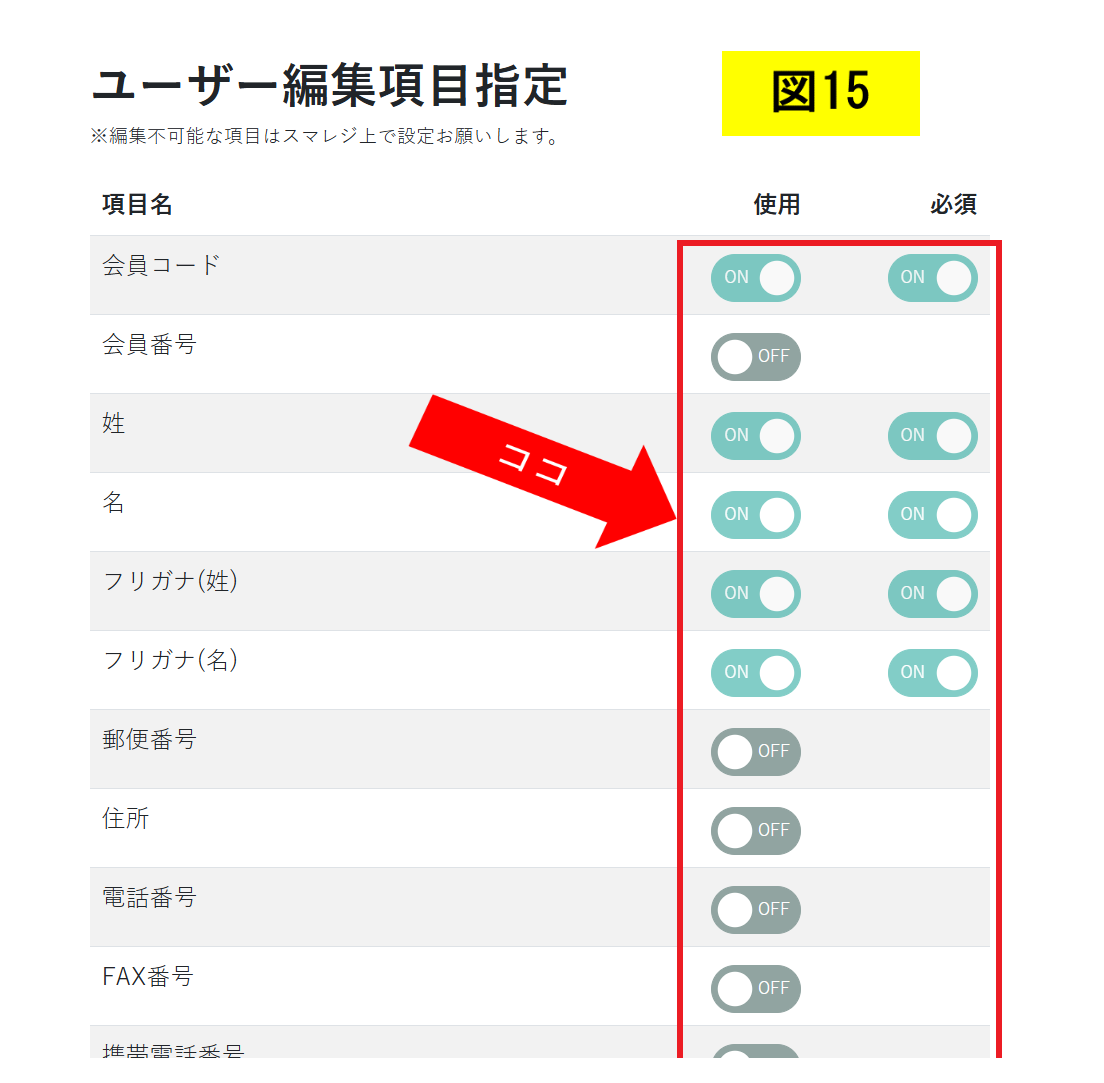
必要なユーザー登録項目を指定してください。(図15)
編集できない項目については、会員情報を登録するースマレジ・ヘルプをご参照ください。
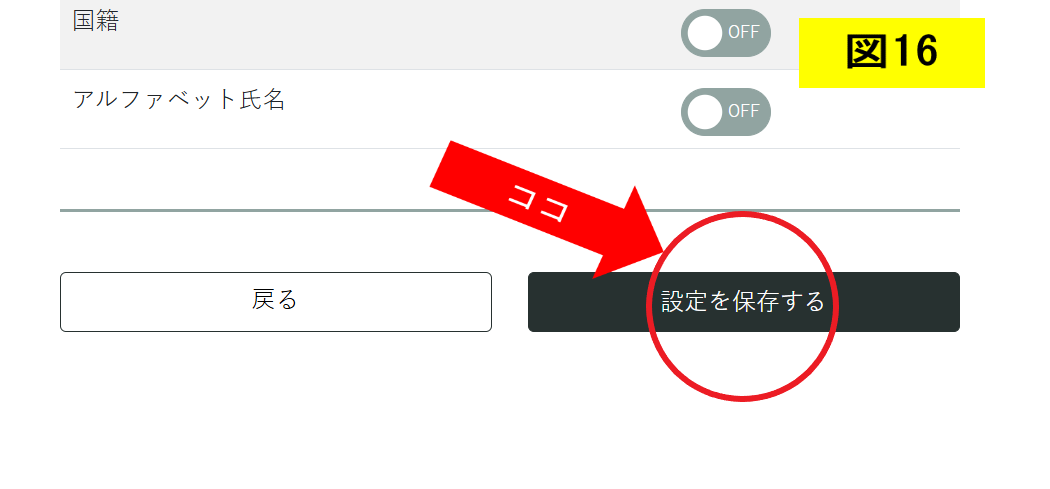
「設定を保存する」をクリックします。(図16)
LINE APPクーポン設定
スマレジの設定画面でクーポン機能の登録、設定をします。(クーポン機能を利用するをご参照ください。)
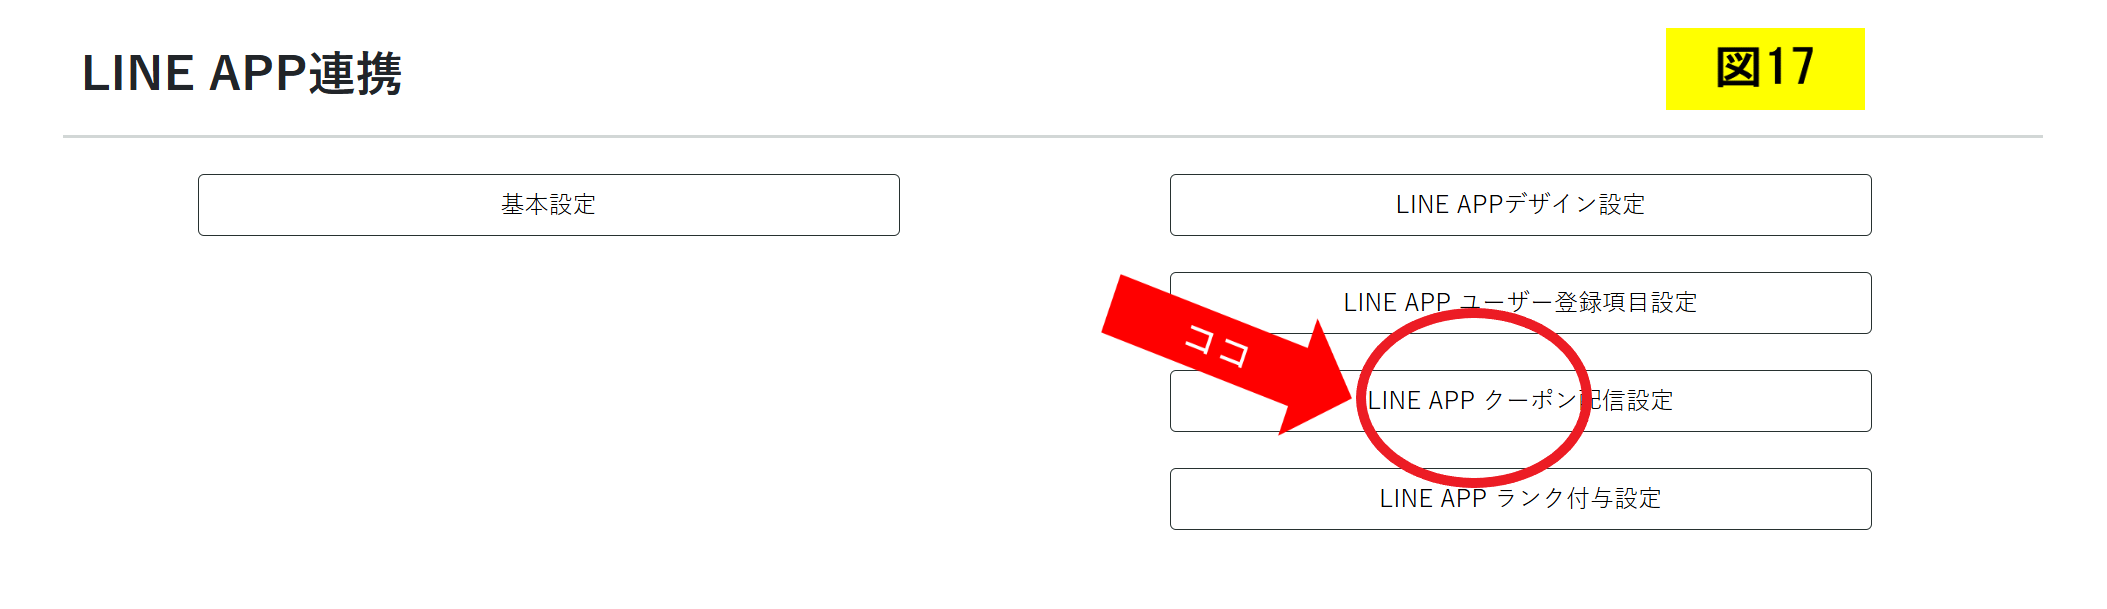
「LINE APP連携」画面に戻り、「LINE APPクーポン配信設定」をクリックします。(図17)
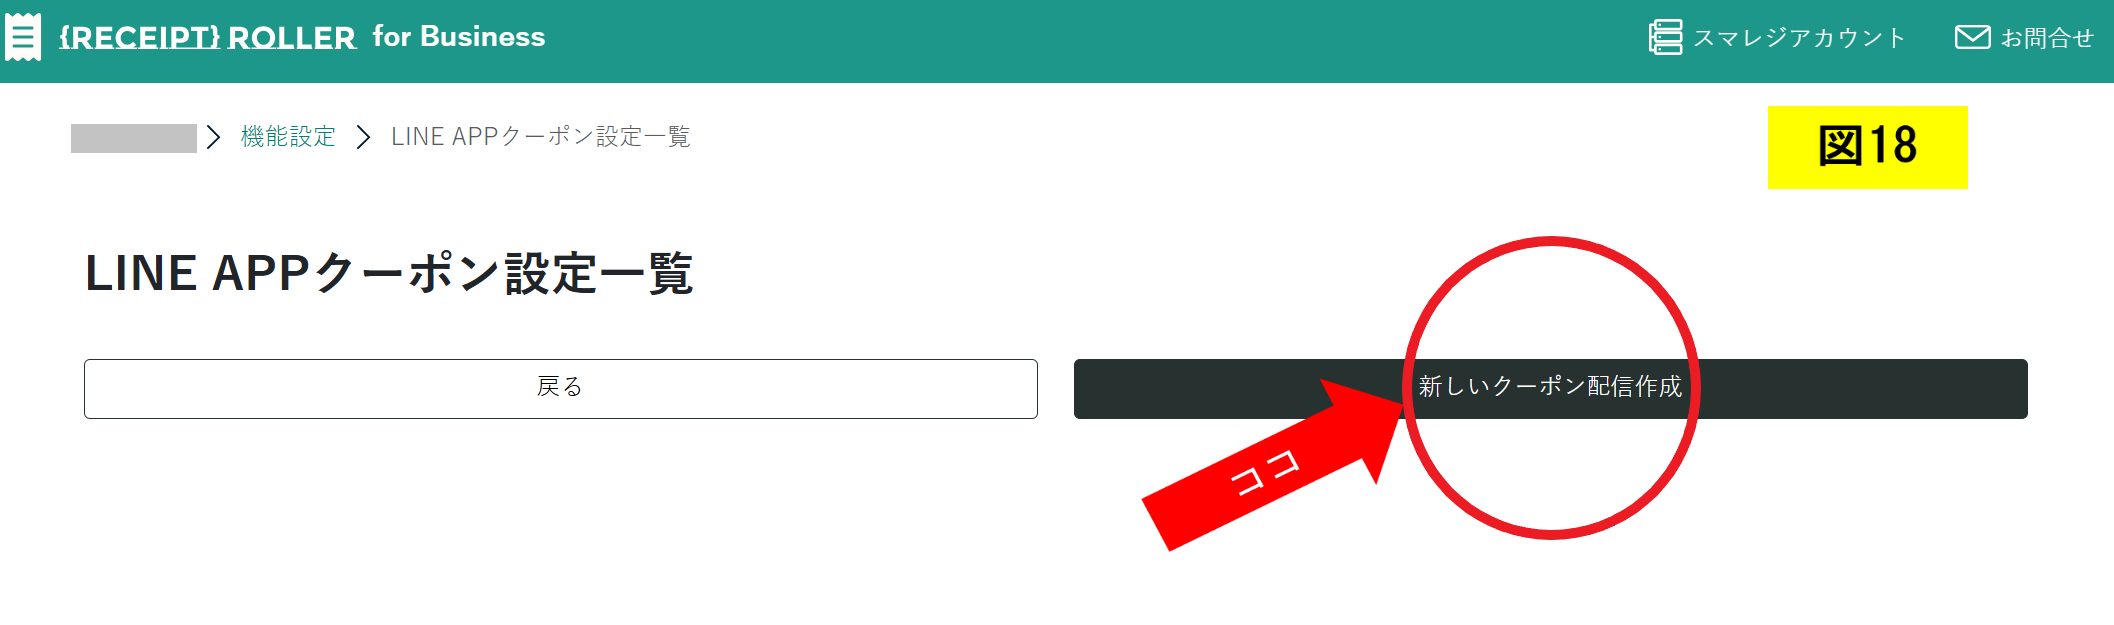
「新しいクーポン配信作成」をクリックします。(図18)
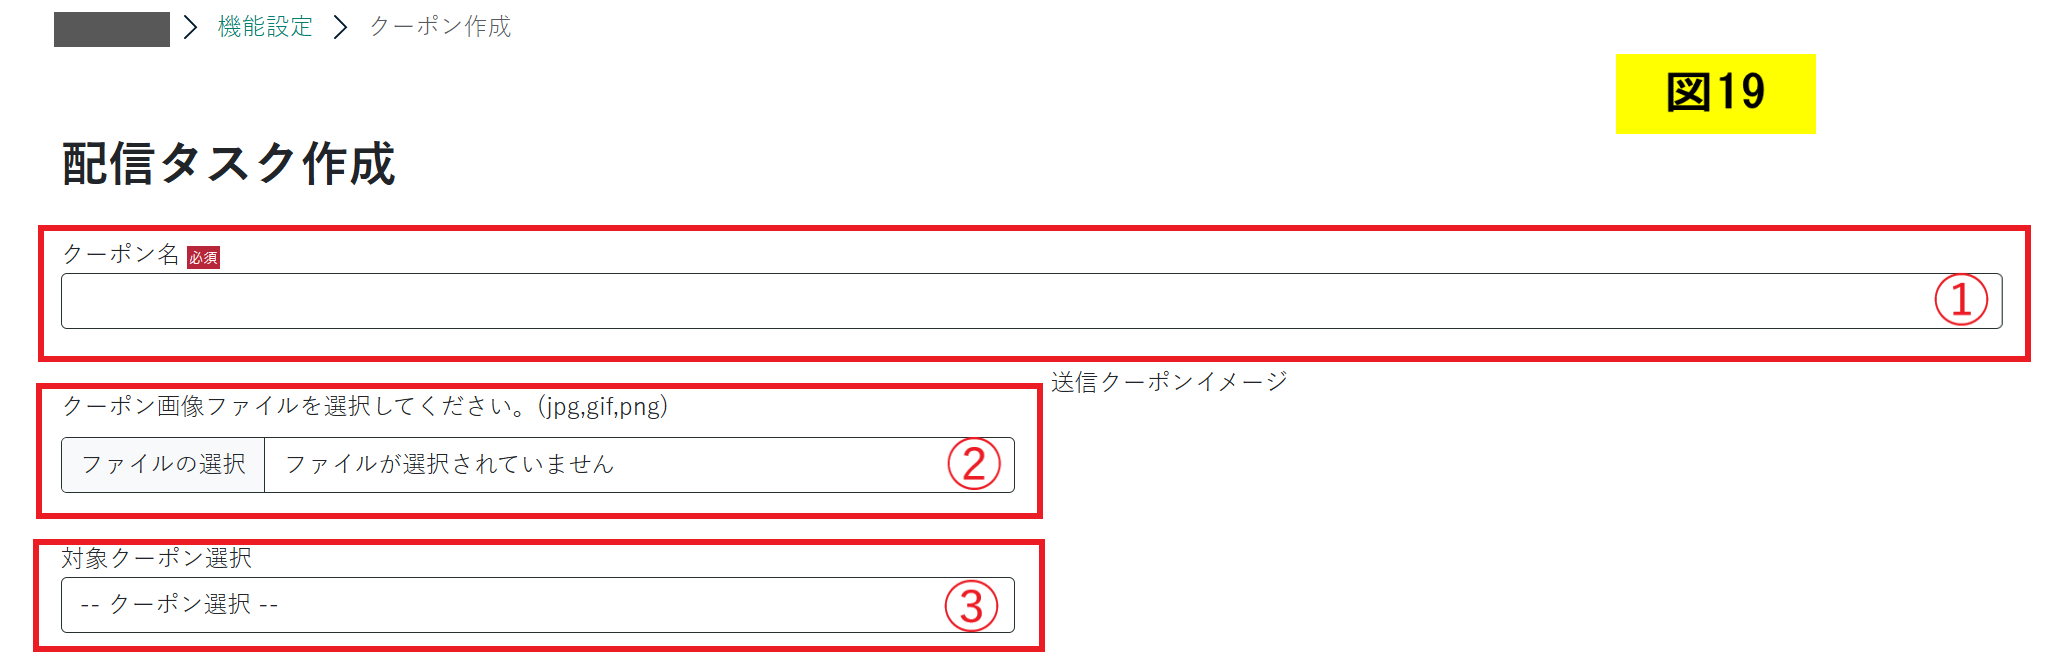
①「クーポン名」を入力
②「クーポン画像アップロード」でファイルを選択
③スマレジ管理画面で設定したクーポンが連携されているので、「対象クーポン」を選択
(図19)
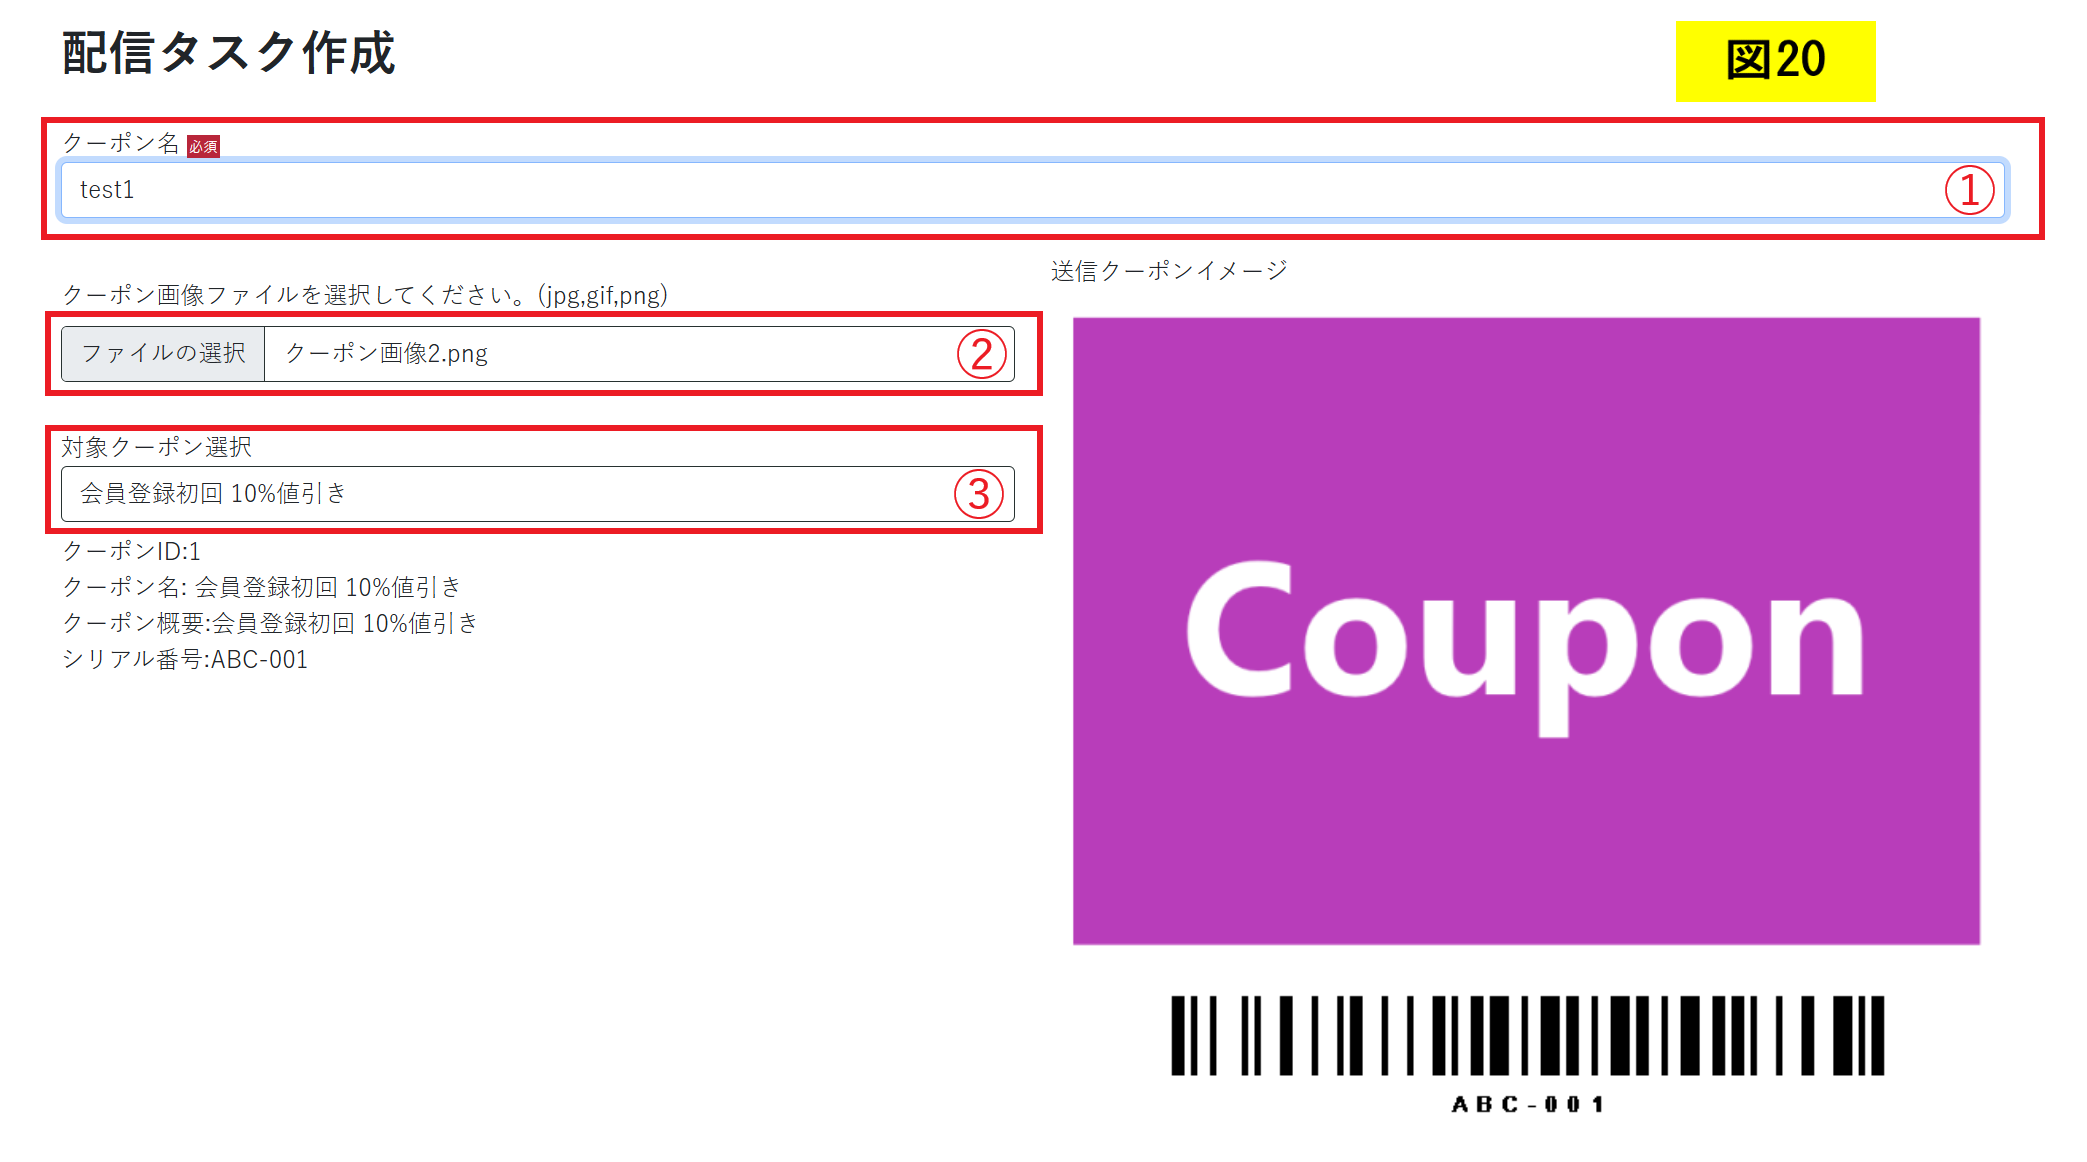
図19で設定すると、クーポン画像が表示されます。(図20)
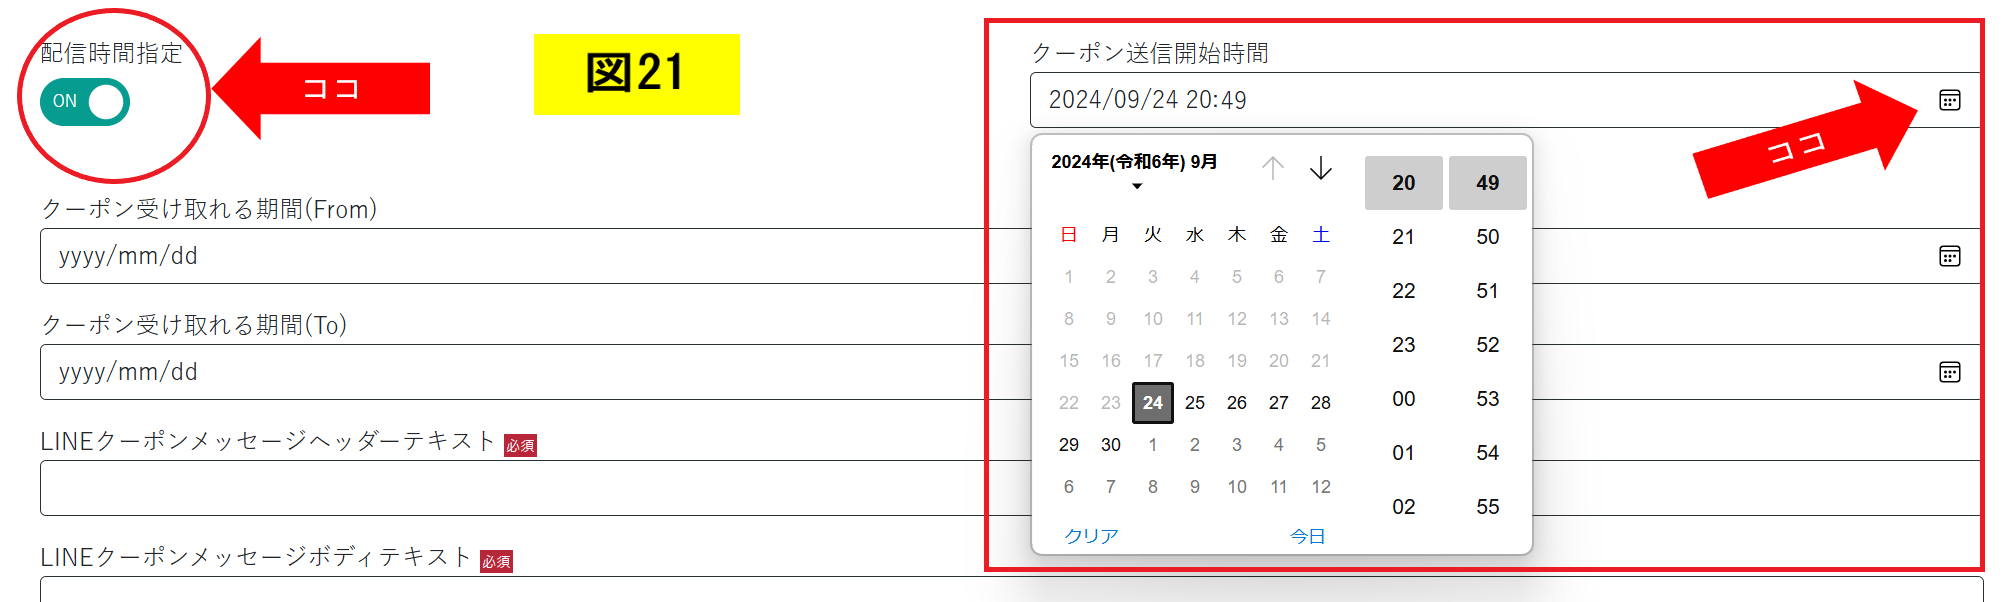
配信時間を指定したい場合は、「on」にして時間の設定をしてください。
「配信時間指定」を「off」にした場合、図〇〇の「クーポンを送信する」をクリックした時間に送信されます。
(図21)
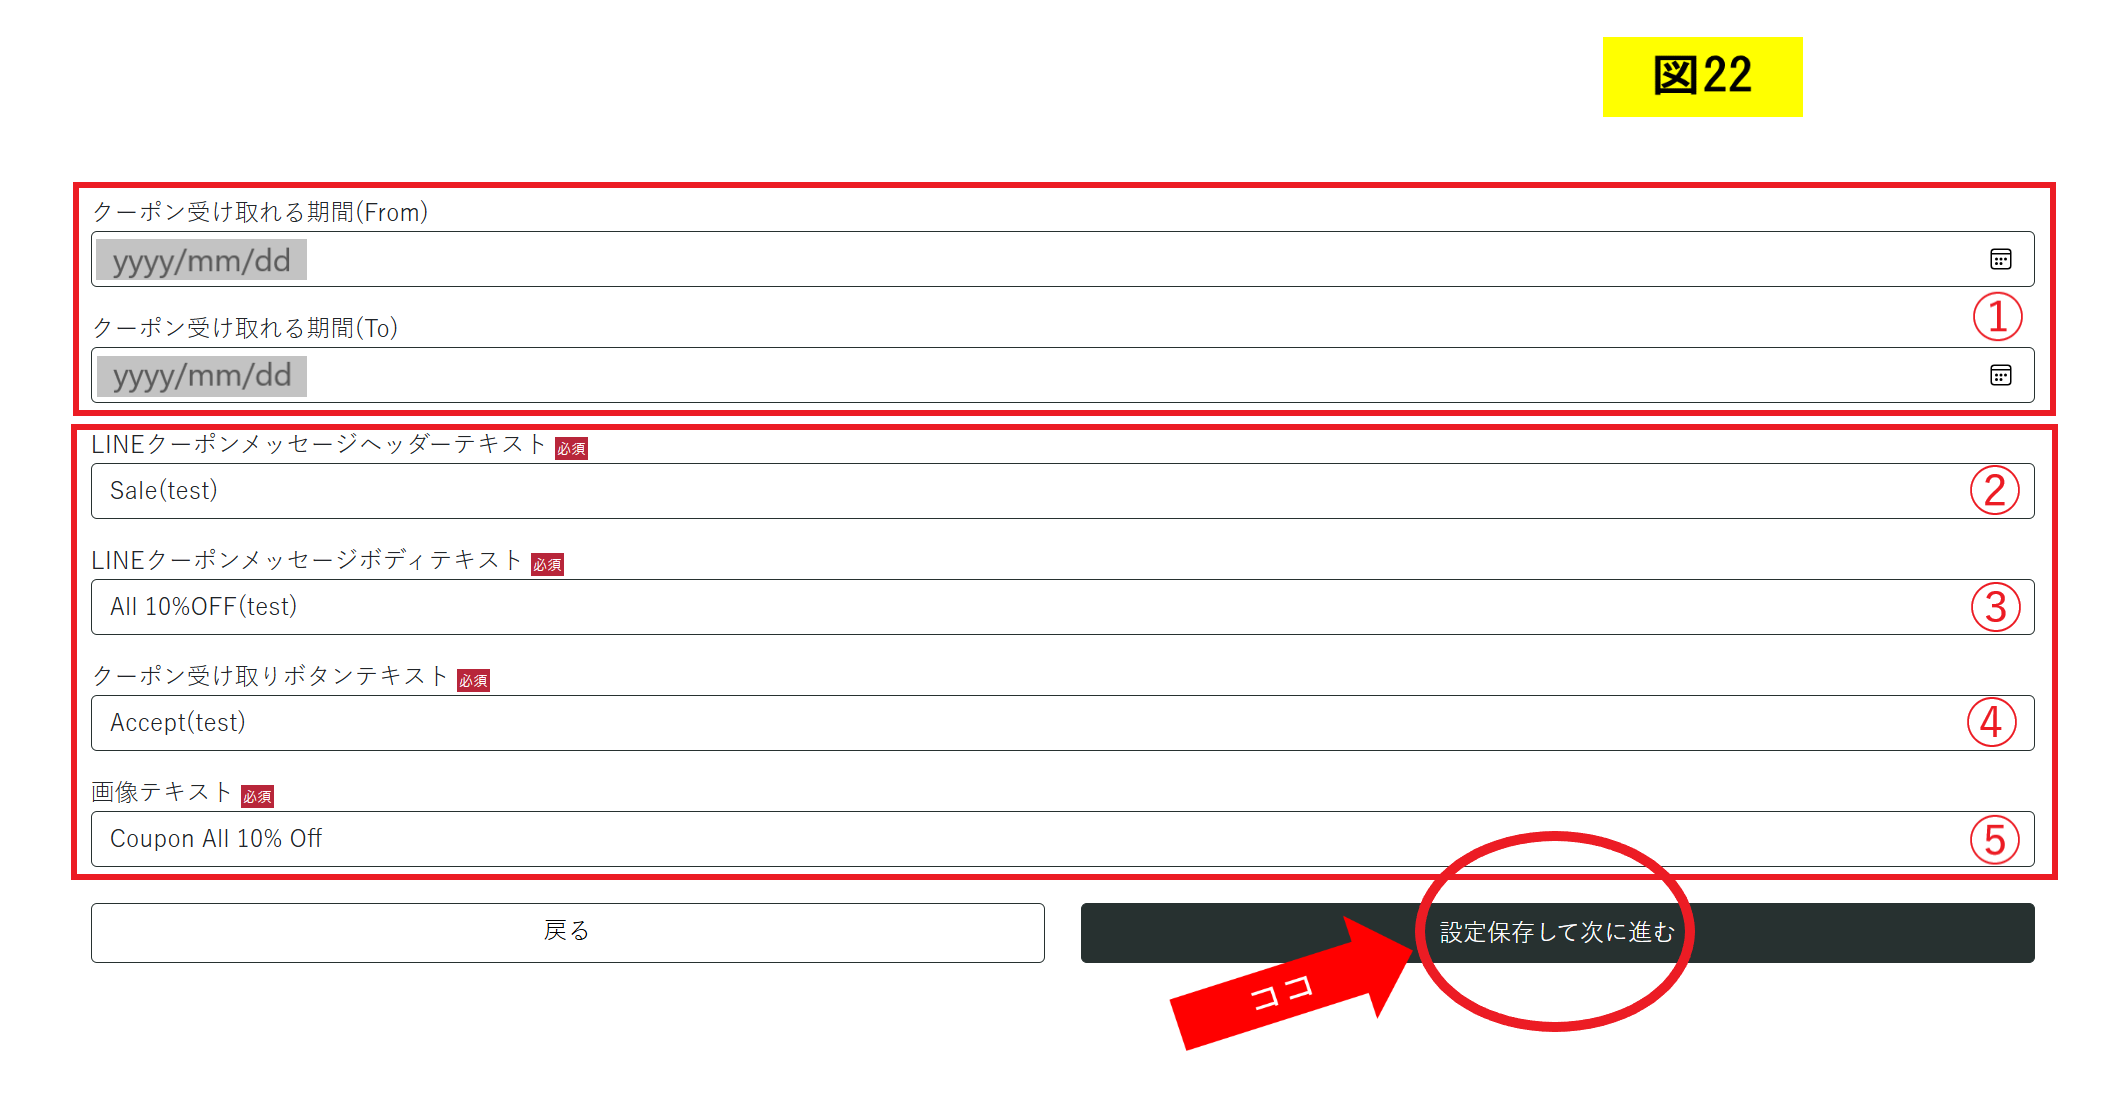
①「クーポンを受け取れる期間」を設定します。
②~⑤を設定します。
「設定保存して次に進む」をクリックします。
(図22)
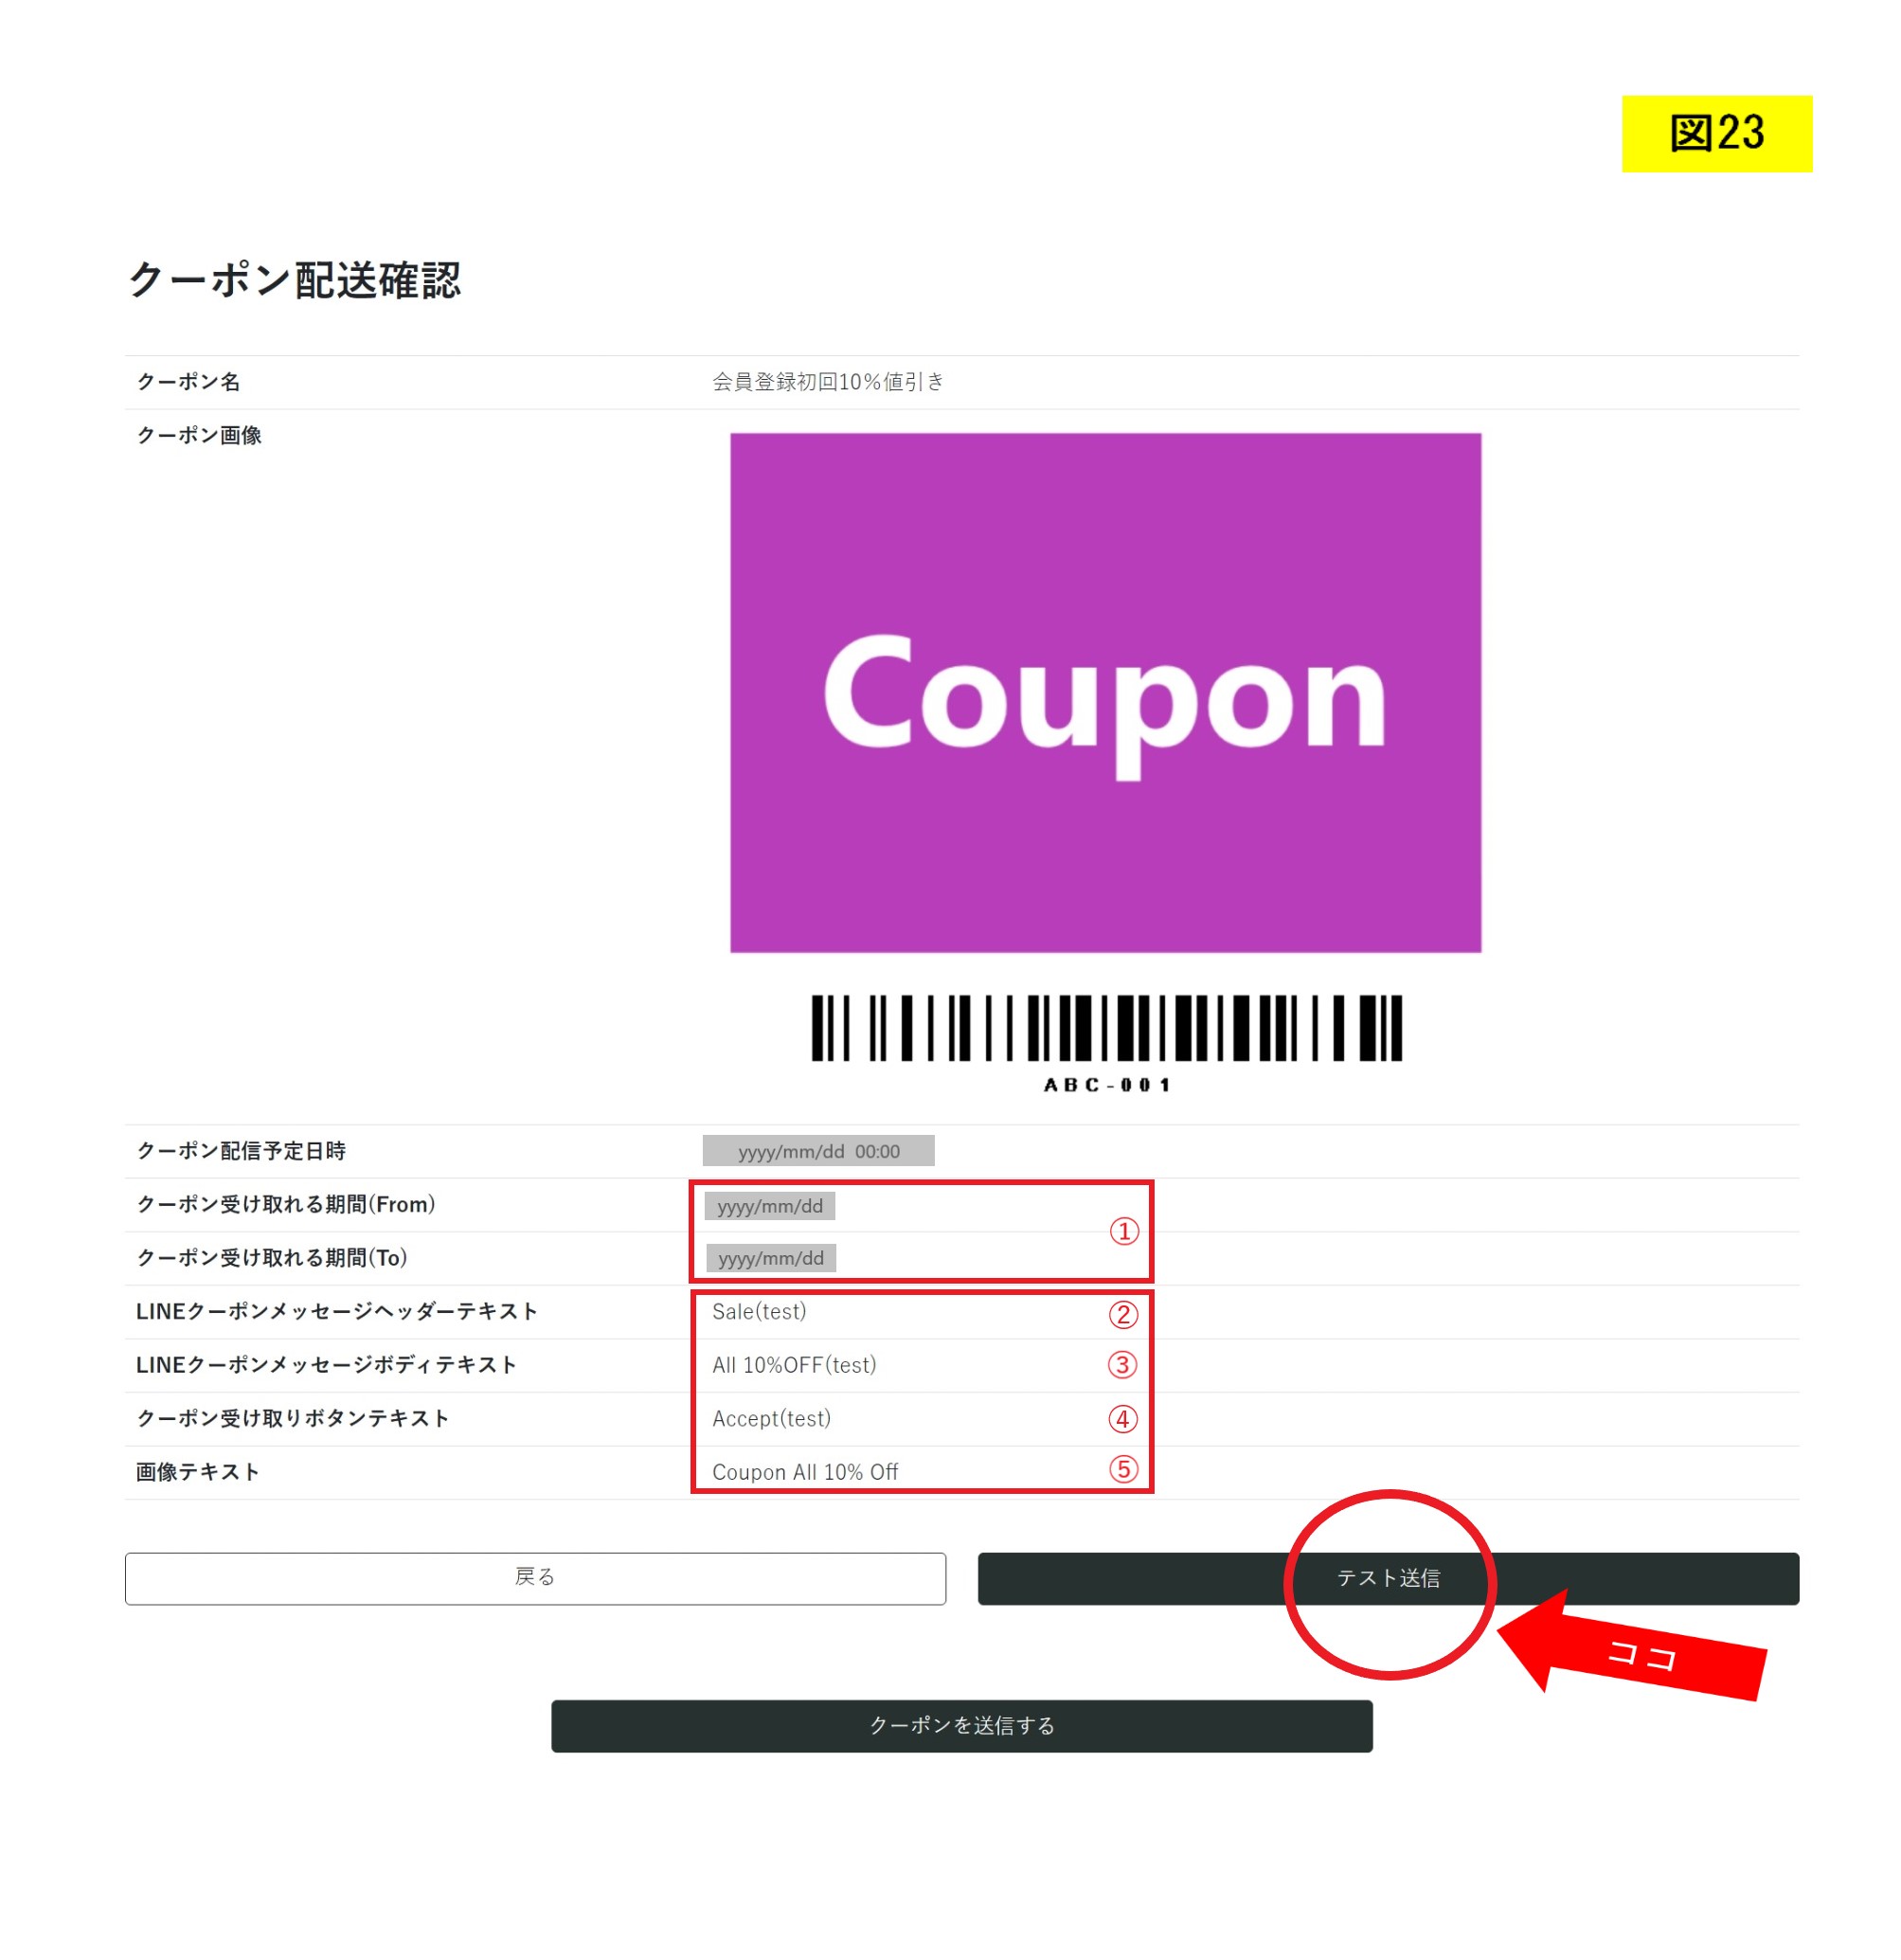
図19~図22の設定が反映され、「クーポン配送確認」画面になります。
テスト送信する場合は、「テスト送信」をクリックします。
(図23)

スマレジ会員コードもしくは会員IDを入力してユーザー検索をし、「テスト送信」をクリックします。 (図24)
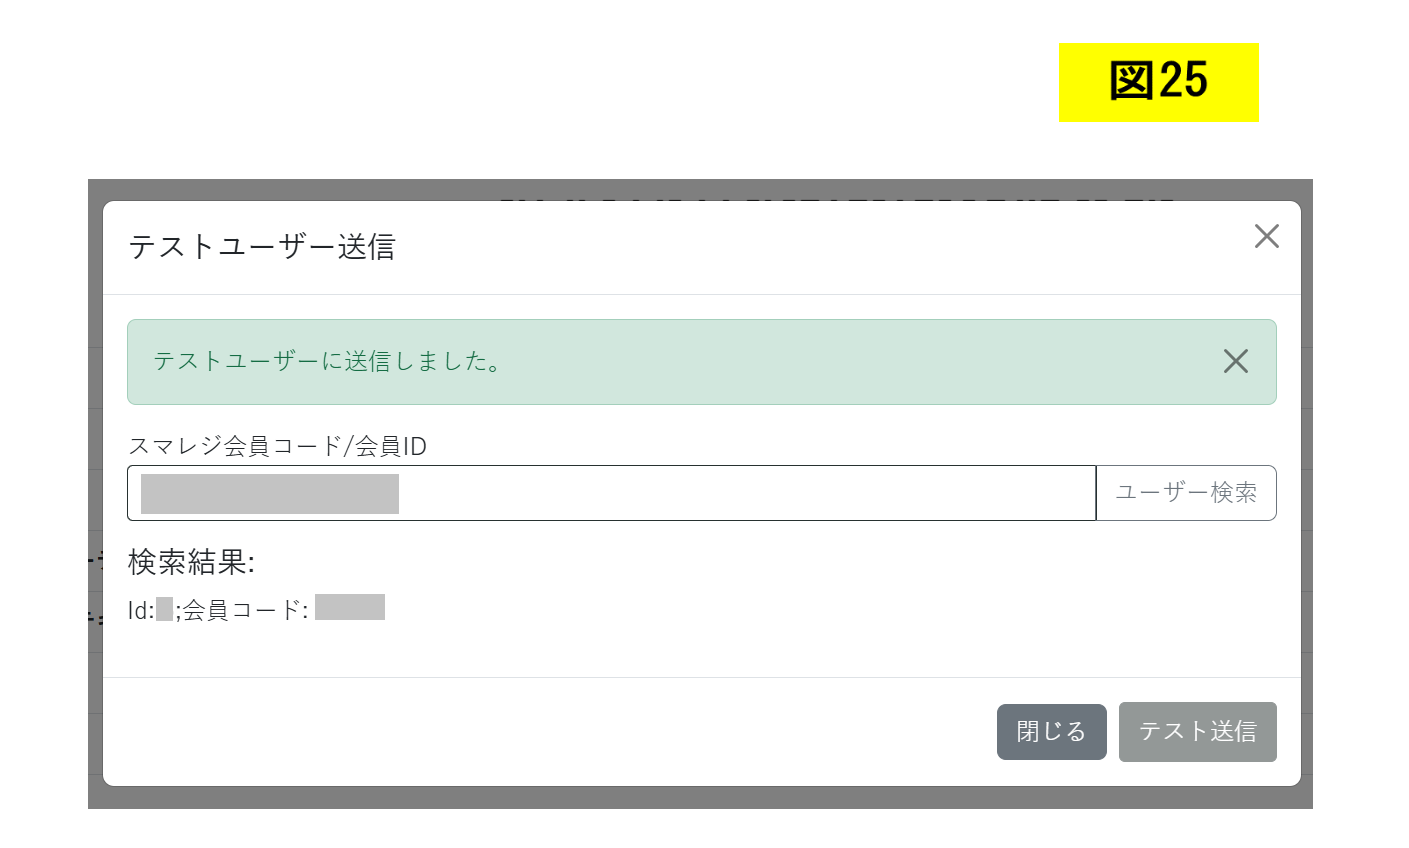
テストユーザーに送信されると、図25の画面が表示されます。 (図25)
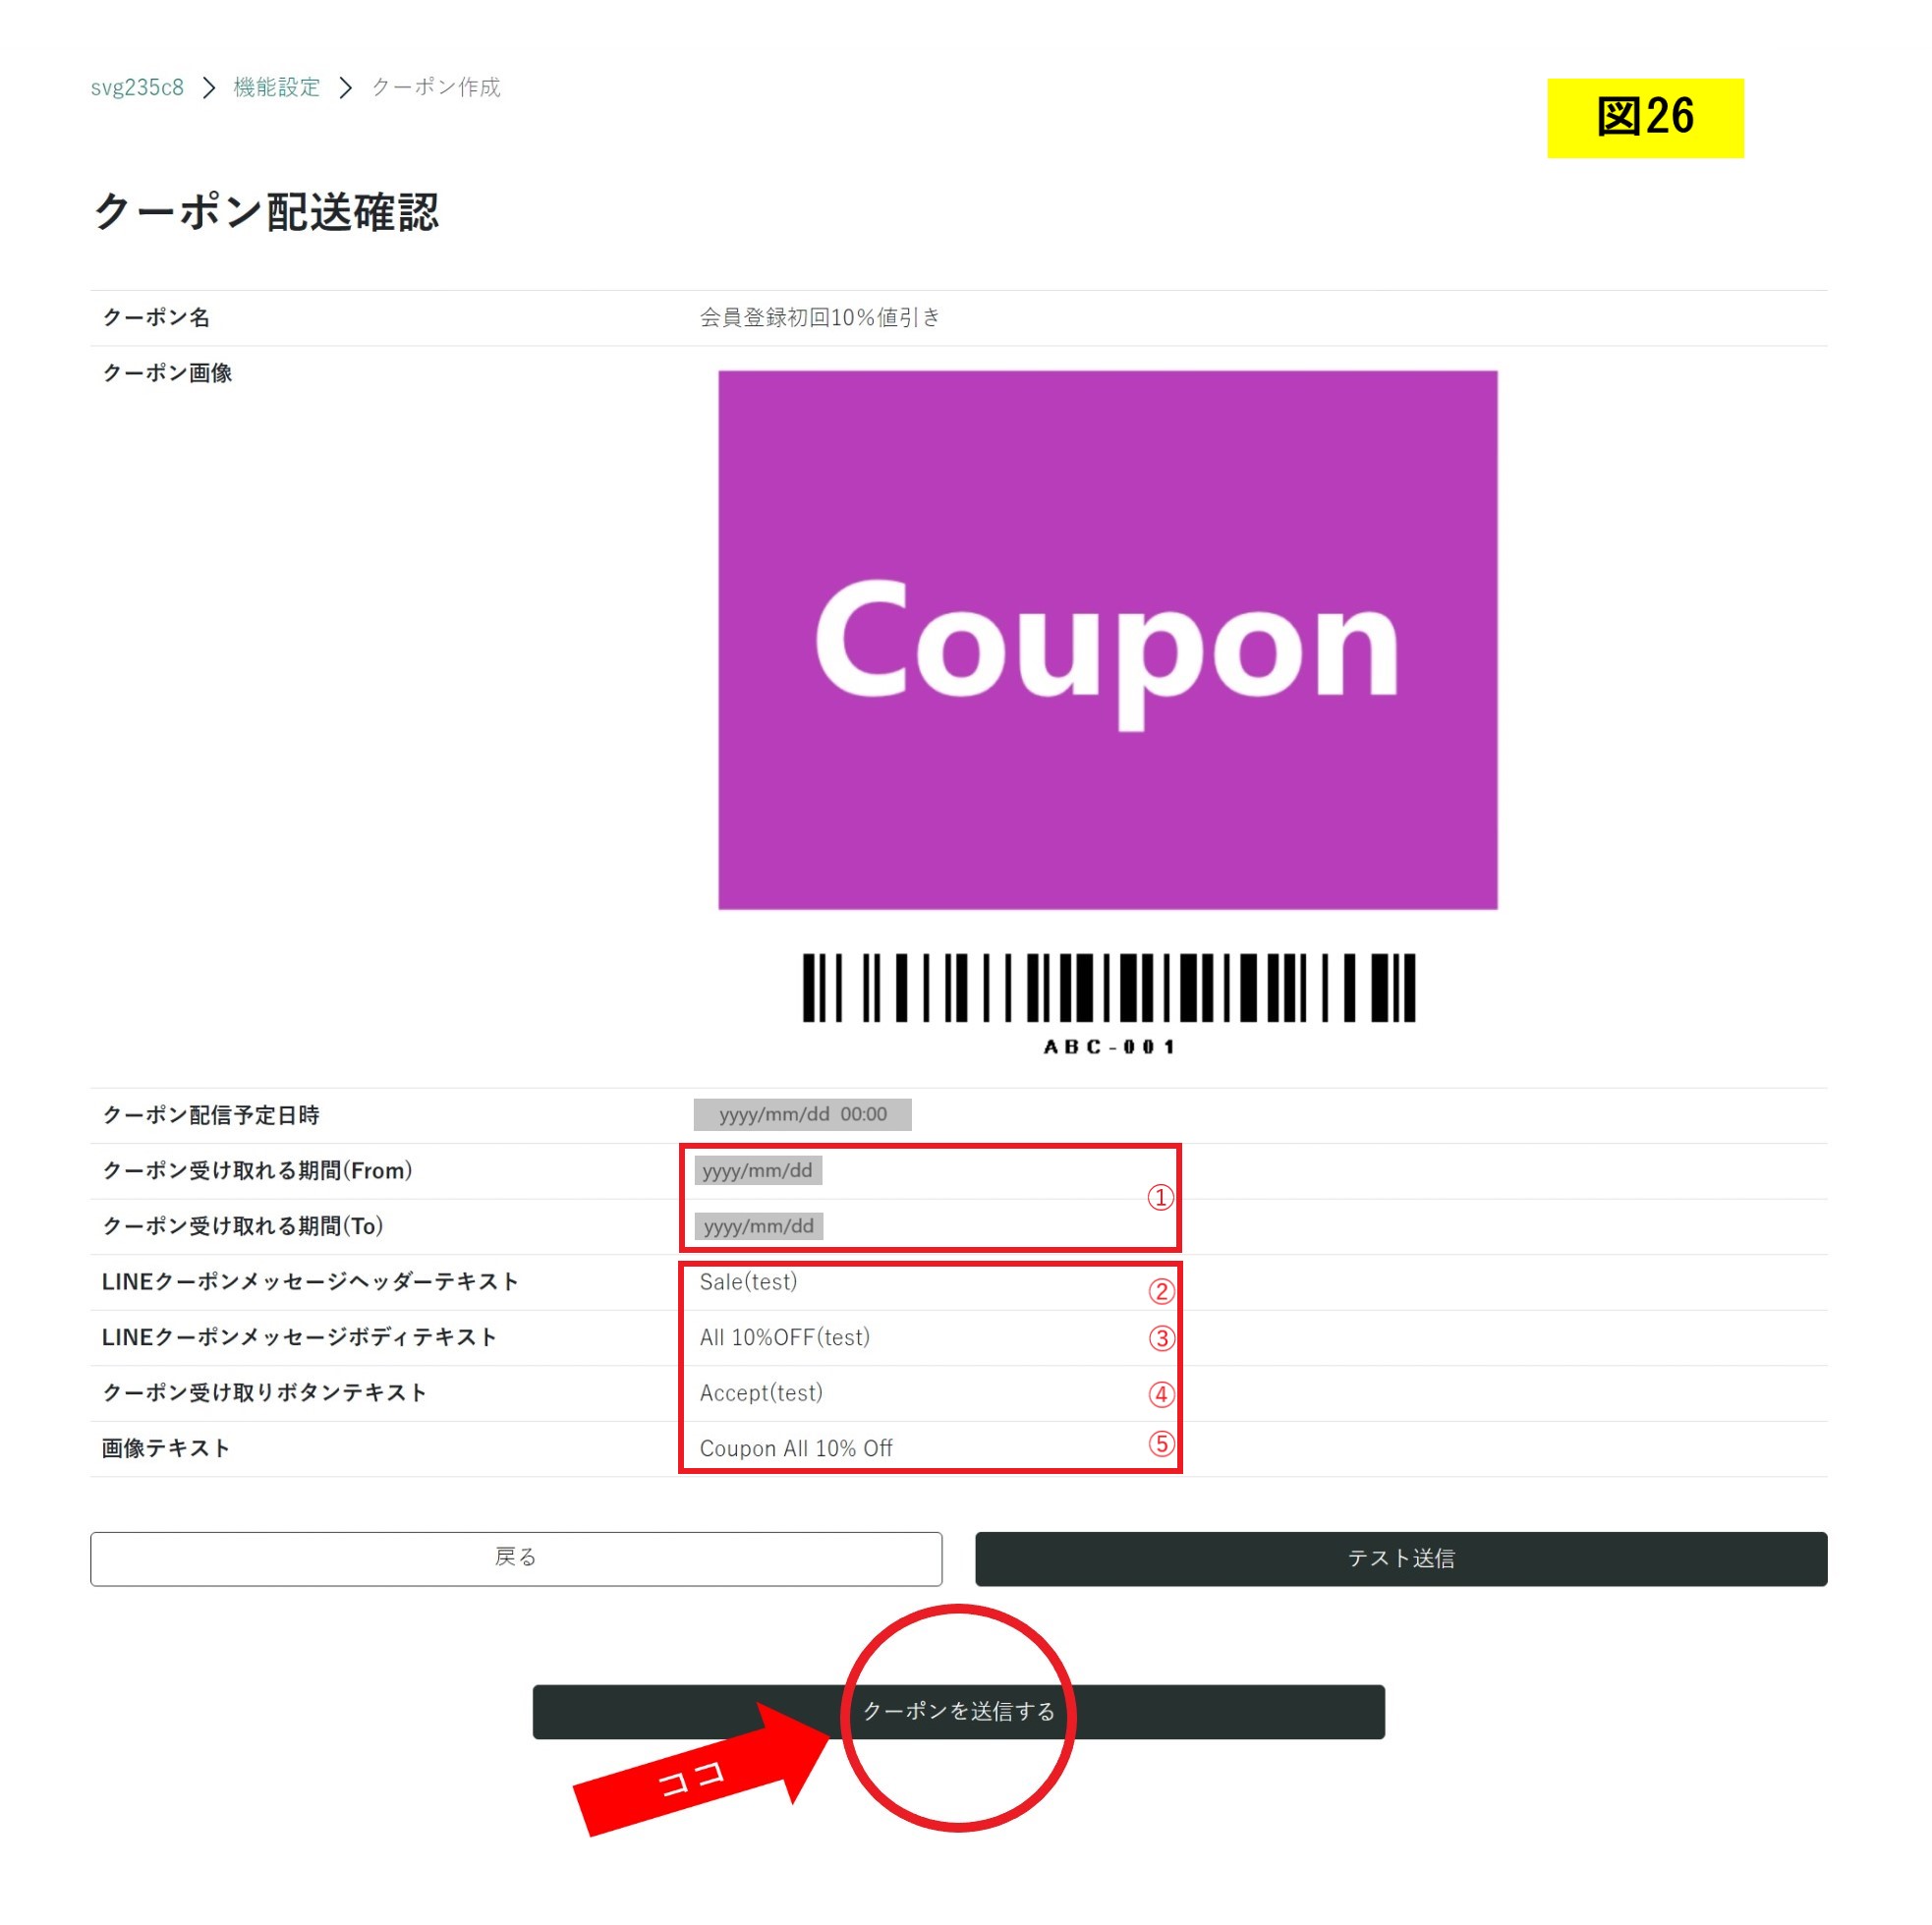
「クーポンを送信する」をクリックします。 (図26)
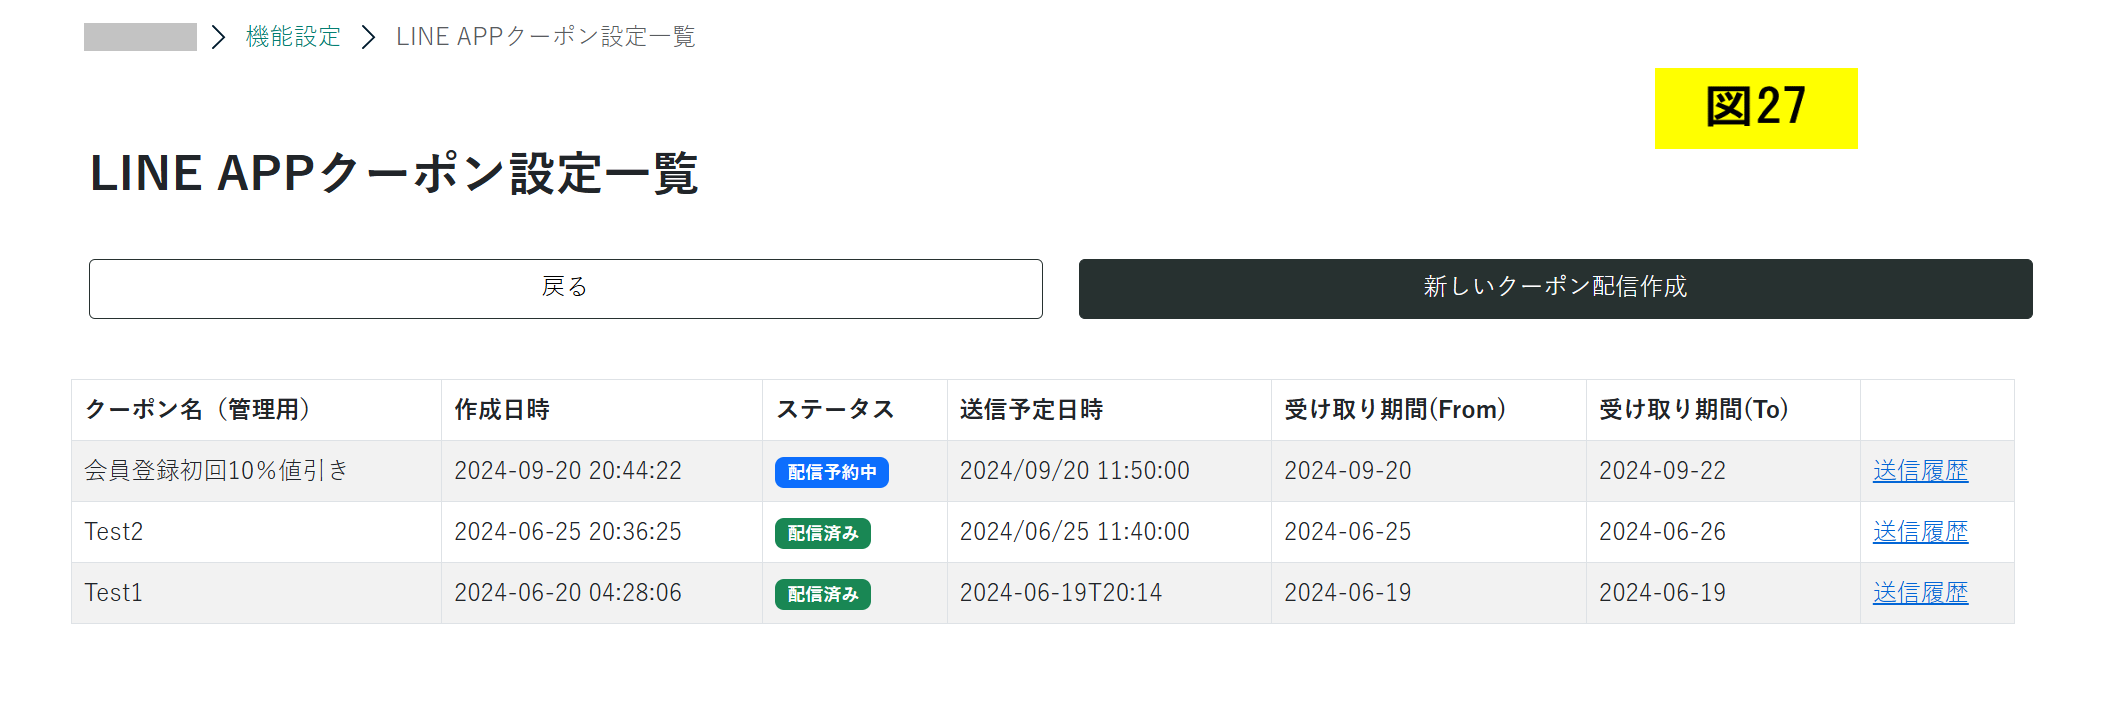
クーポンが送信されると、「LINE APPクーポン設定一覧」が表示されます。 (図27)
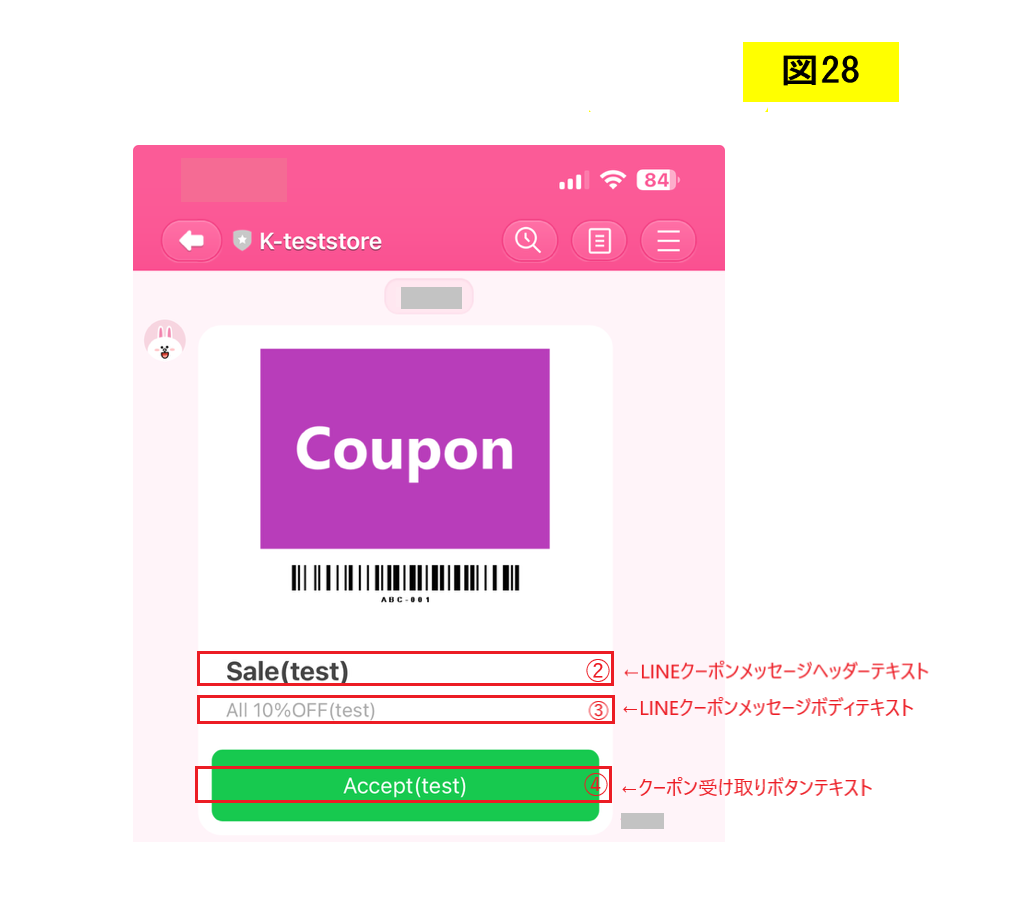
LINEに送信されたクーポンになります。
図22で設定した②~④はこちらのように表示されます。
図22で設定した⑤「画像テキスト」はメッセージ配信タイトルとなり、LINEのトーク画面に表示されます。
(図28)
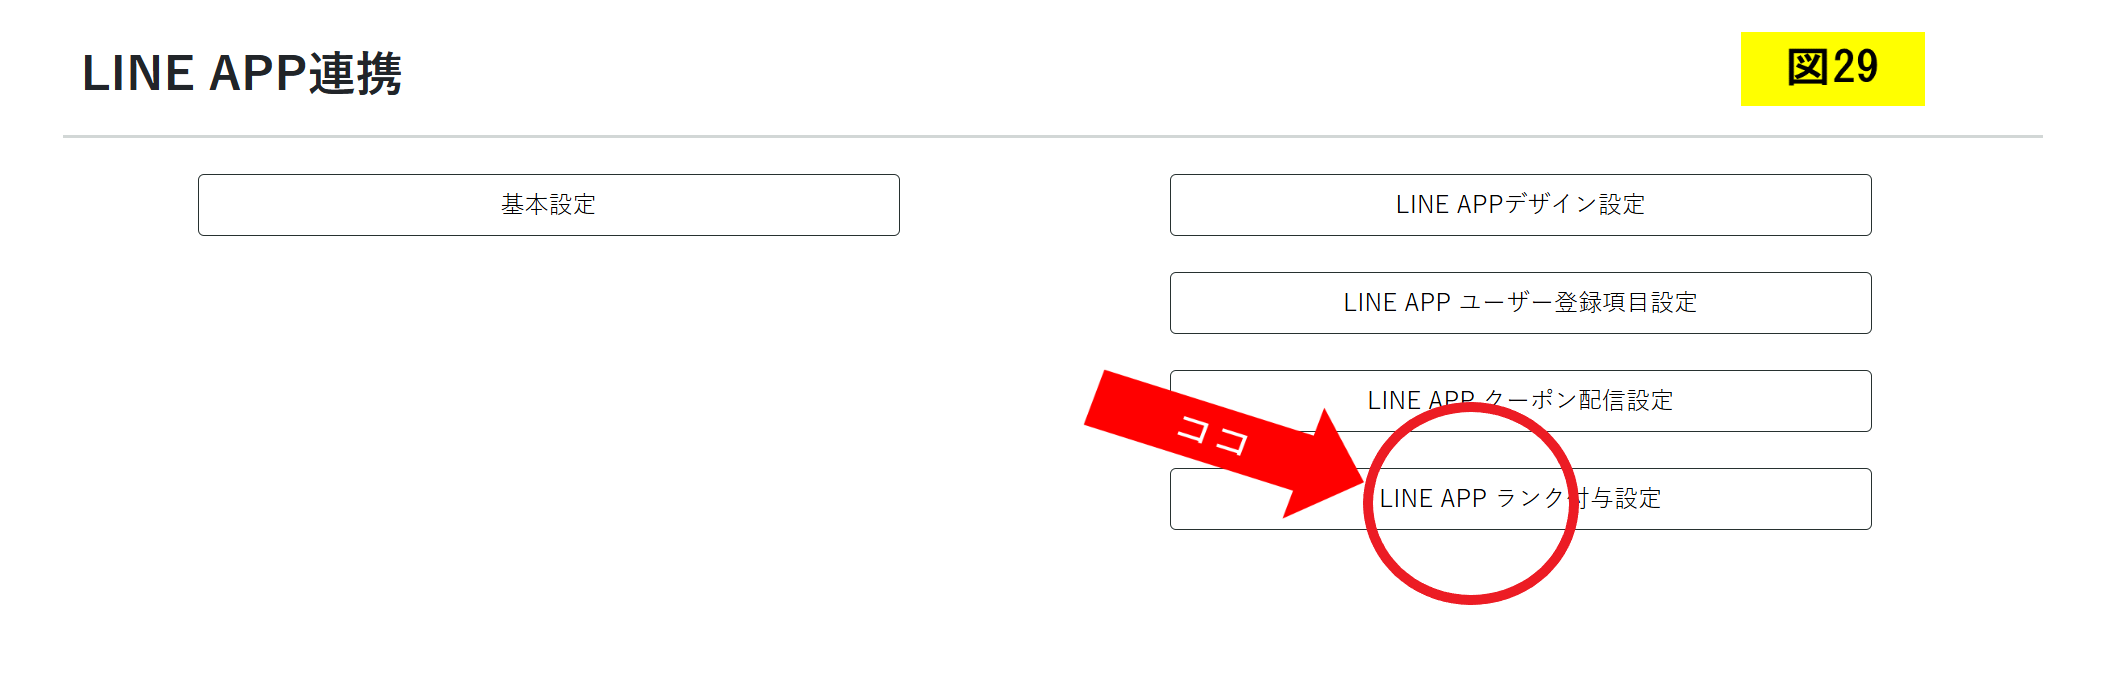
LINE APPランク付与設定
スマレジの管理画面より会員ランクの設定をしてください。(会員毎にランクを設定するをご参照ください。)
「LINE APP連携」画面に戻り、「LINE APPランク付与設定」をクリックします。(図29)
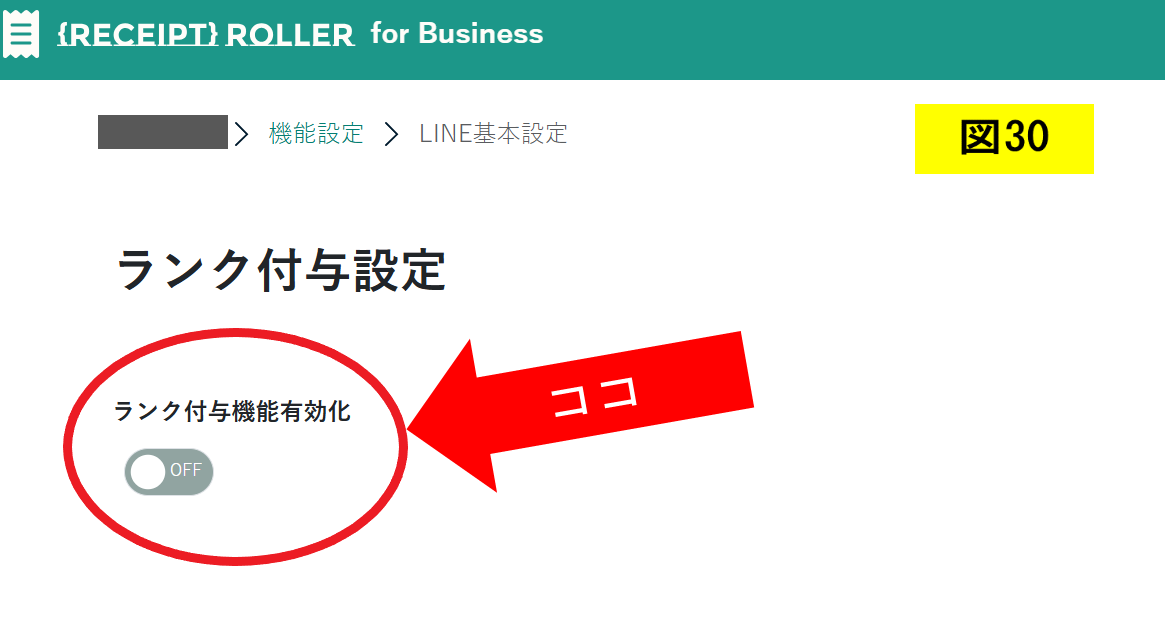
「ランク付与機能有効化」を設定します。ランクを付与しない場合は、「OFF」を選択してください。(図30)
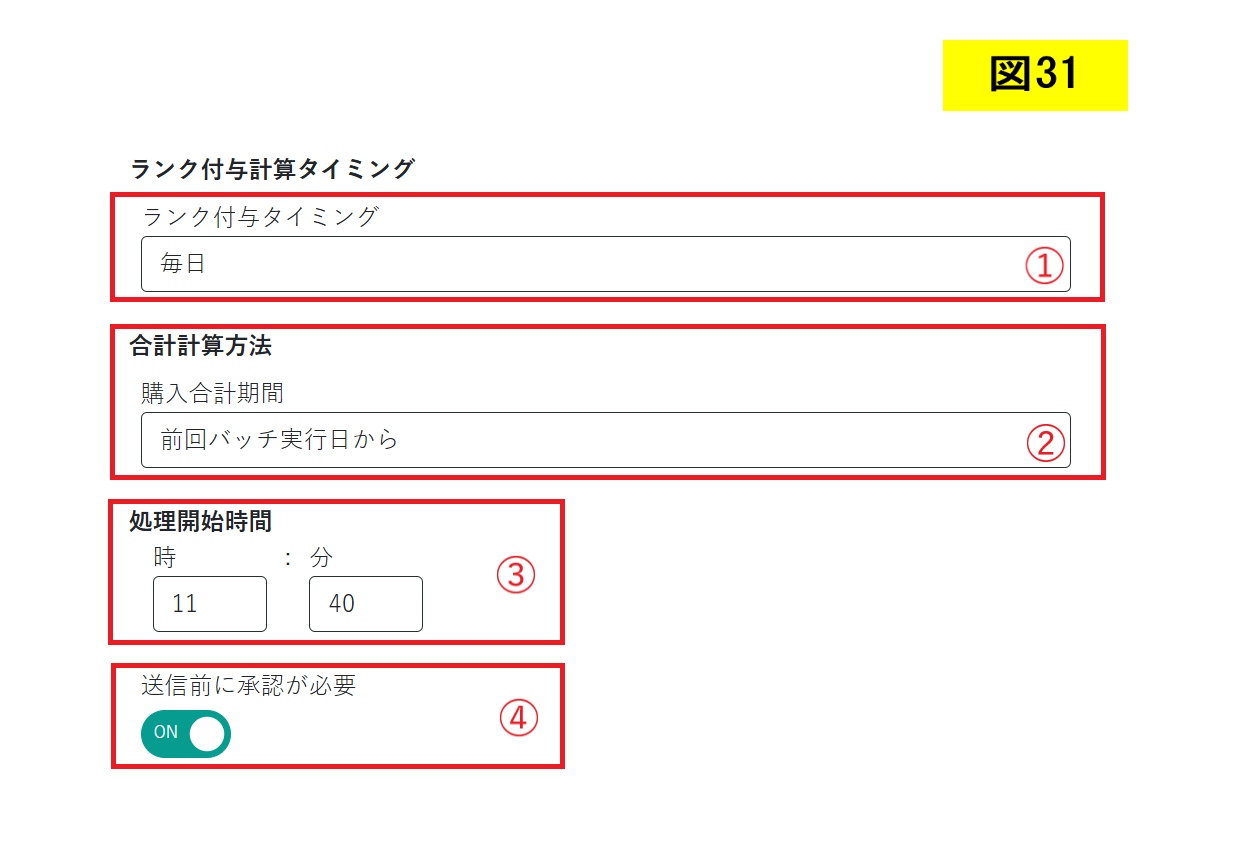
①「ランク付与タイミング」を設定します。
②「合計計算方法」を設定します。
③「処理開始時間」を設定します。
④「送信前に承認が必要」を設定します。
「OFF」の場合は、①と③で設定した日時に送信が実行されます。
「ON」の場合は、ランク付与設定完了後に承認画面が表示されます。
(図31)

「ランクごと付与条件」を設定します。
スマレジ管理画面で設定した会員ランクが同期されます。
②で「ON」にすると①で設定した最小購入額を超えた場合にランク付与され、「OFF」にしたランクはランク付与がされません。
(図32)
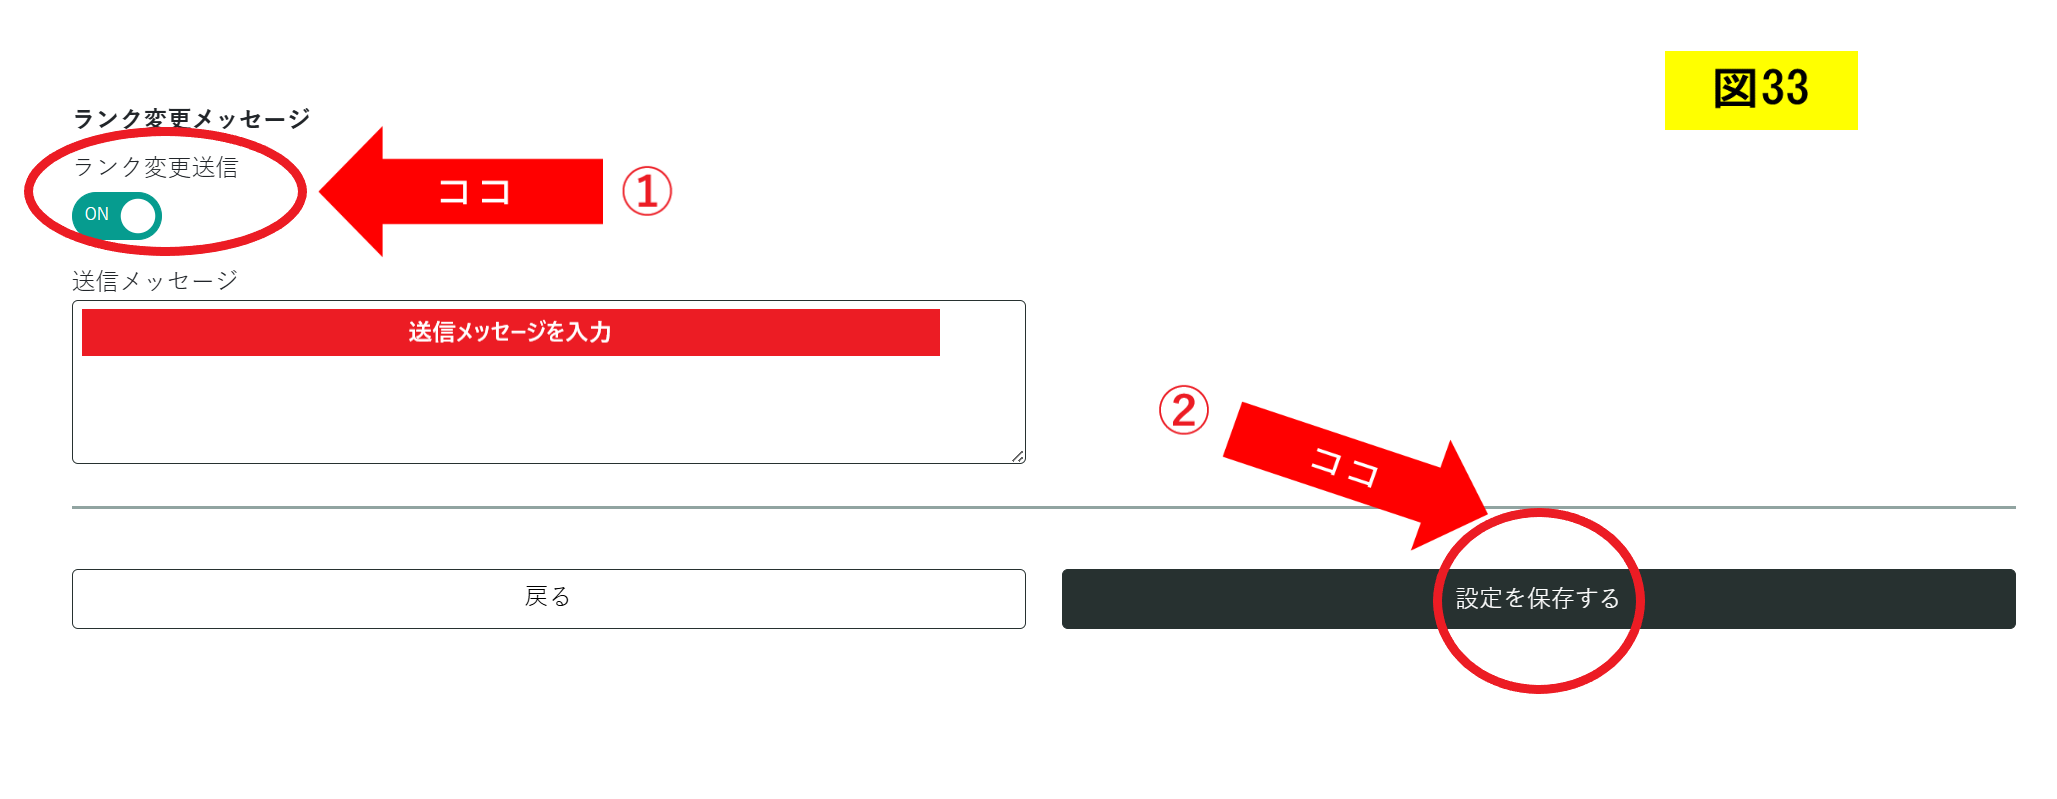
①「ランク変更メッセージ」を設定します。「ON」にするランク変更の処理開始時間にメッセージが送信されます。
②「設定を保存する」をクリックします。
(図33)
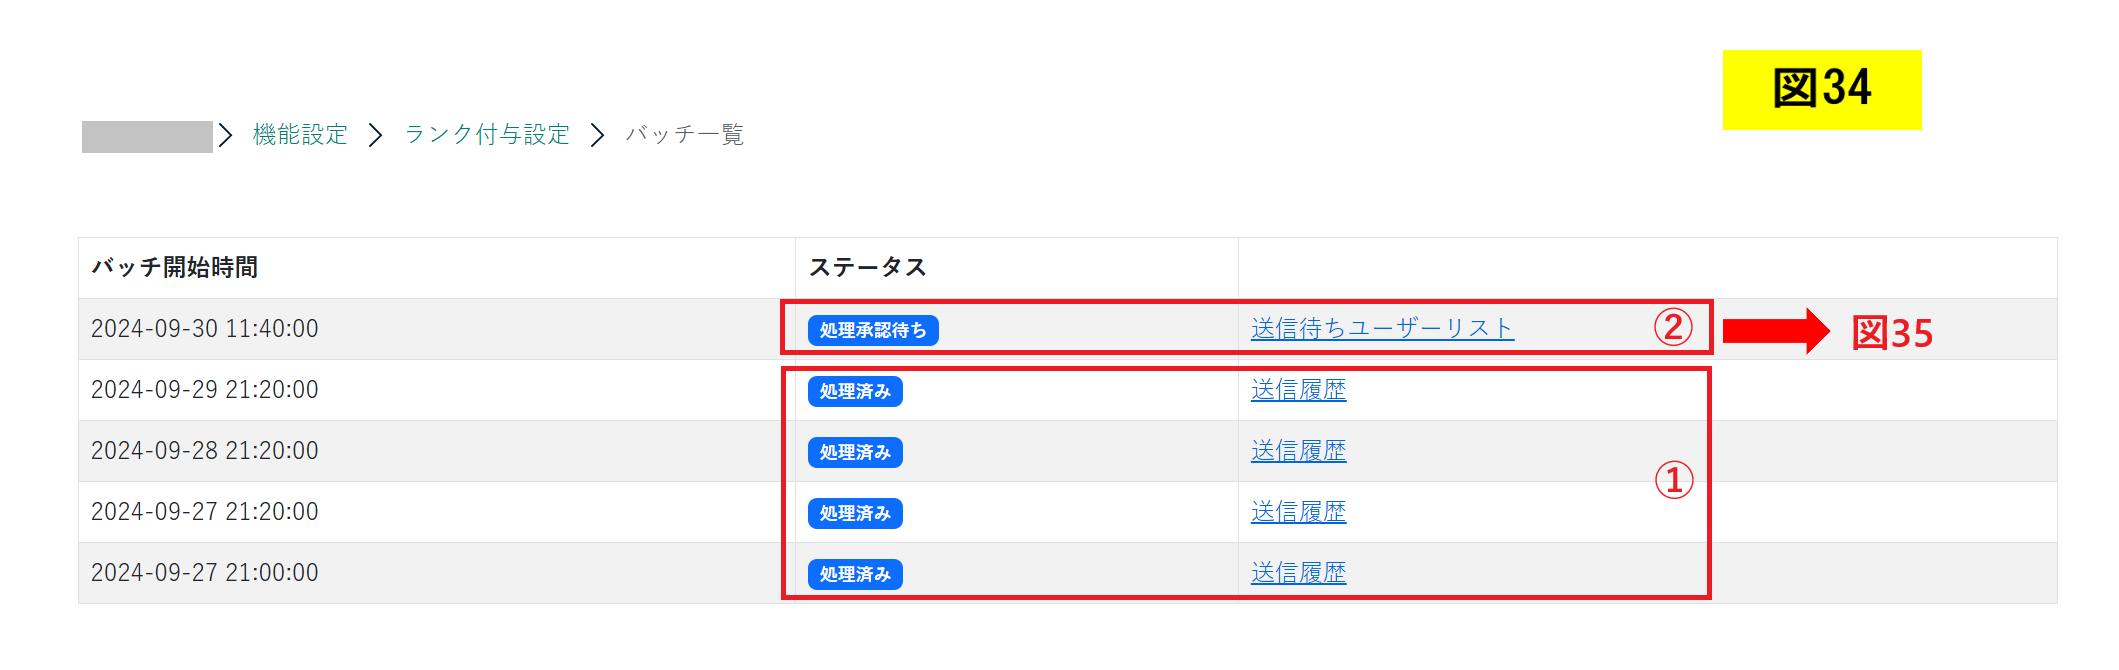
①図31の「送信前に承認が必要」を「OFF」にした場合、ステータスで「処理済み」と表示されます。
②「送信前に承認が必要」を「ON」にした場合、ステータスで「処理承認待ち」と表示されるので、「送信待ちユーザーリスト」をクリックします。
(図34)
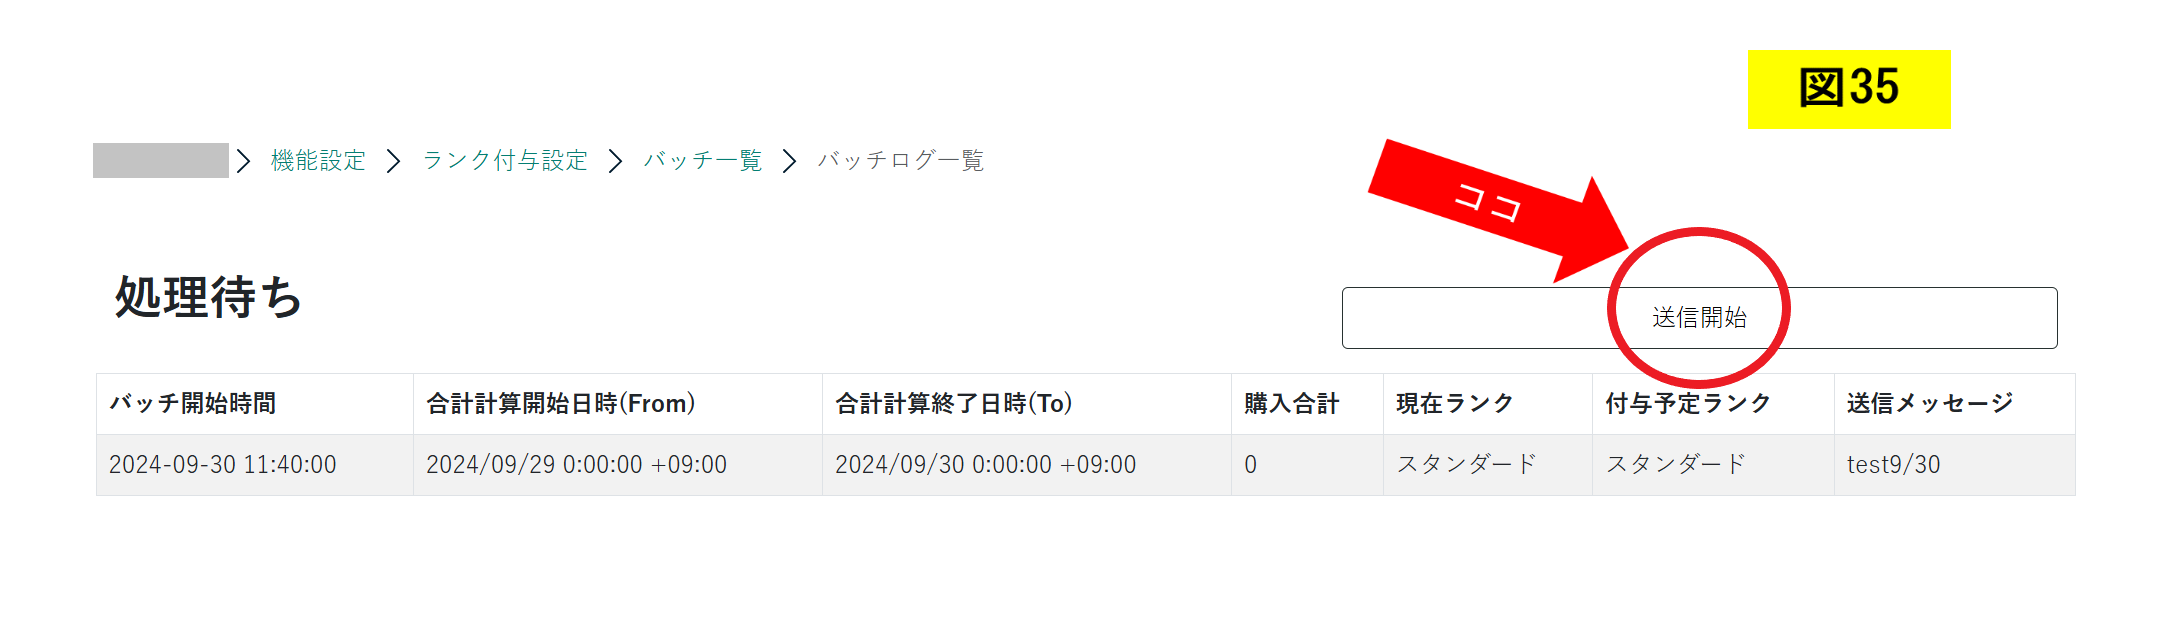
「処理待ち」の画面が表示されます。
「送信開始」をクリックすると、ランク付与の処理がされます。
(図35)
LINEリッチメニューの設定終了となります。多くの設定項目がありますので、サポートが必要な際にはご連絡ください。

紙レシートゼロの世界目指して電子レシートサービスのサポートを行っています。 数多くの方にご利用いただけるようにヘルプ・FAQドキュメントなど作成しています。